Oculus Air Link is an integrated way to play PC VR games (on Oculus PC or SteamVR) wirelessly on Quest or Quest 2. This guide will show you how to activate the Air Link feature on both your headset and your desktop software.
Updated – January 13th, 2022
ℹ In order to use Air Link your PC hardware also meet the Oculus Link requirements.
Just like Oculus Link allows you to plug into a VR ready PC to play PC VR games, Oculus Air Link allows you to do so wirelessly.
For optimal Air Link performance, Oculus recommends the following:
- Have your PC connected to your Router/Access Point via Ethernet cable
- Headset should be connected to Wi-Fi via 5GHz band – AC or AX (AKA Wi-Fi 5 or Wi-Fi 6)
- Your router shoulder be in the same room as the headset or in line-of-sight, and at least 1m off the ground
- Don’t use a mesh network (range extenders, etc.)
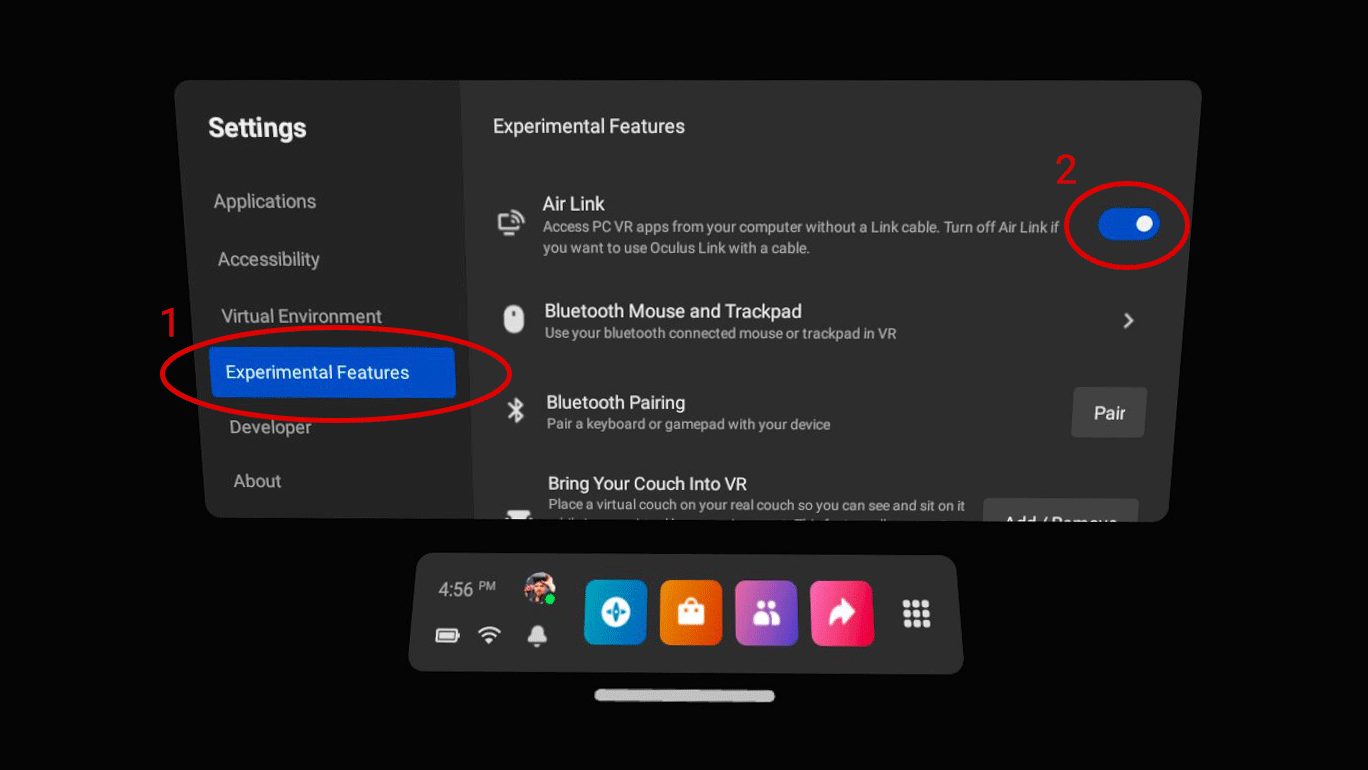
To enable Oculus Air Link on Quest there’s a few steps you’ll need to go through. Here’s the breakdown.
Oculus Air Link requires that both your Quest headset and Oculus PC software are running v30 or later. Here’s how to check:
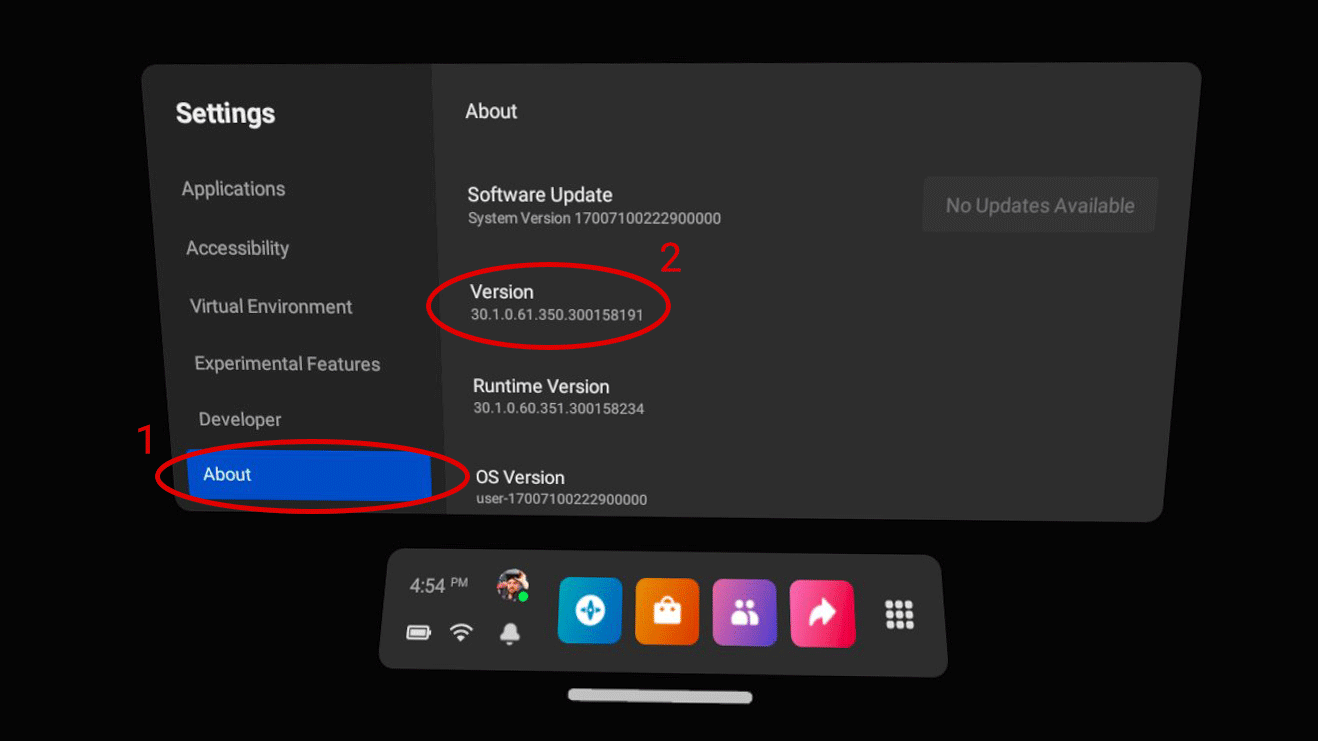
On Quest
- In your Quest headset, open the Settings app (in your app library)
- On the left side of the Settings page, scroll down to find the About section
- On the About page, see the Version section, which should read 30.X or later (it may be a very long version number, like 30.0.0.221.359…)
If you aren’t already on v30 or later, see if there’s a prompt to update your headset on the About page next to the Software Update section. There’s no way to force the update, but if it says ‘No Updates Available’, you could try restarting your headset and checking again.
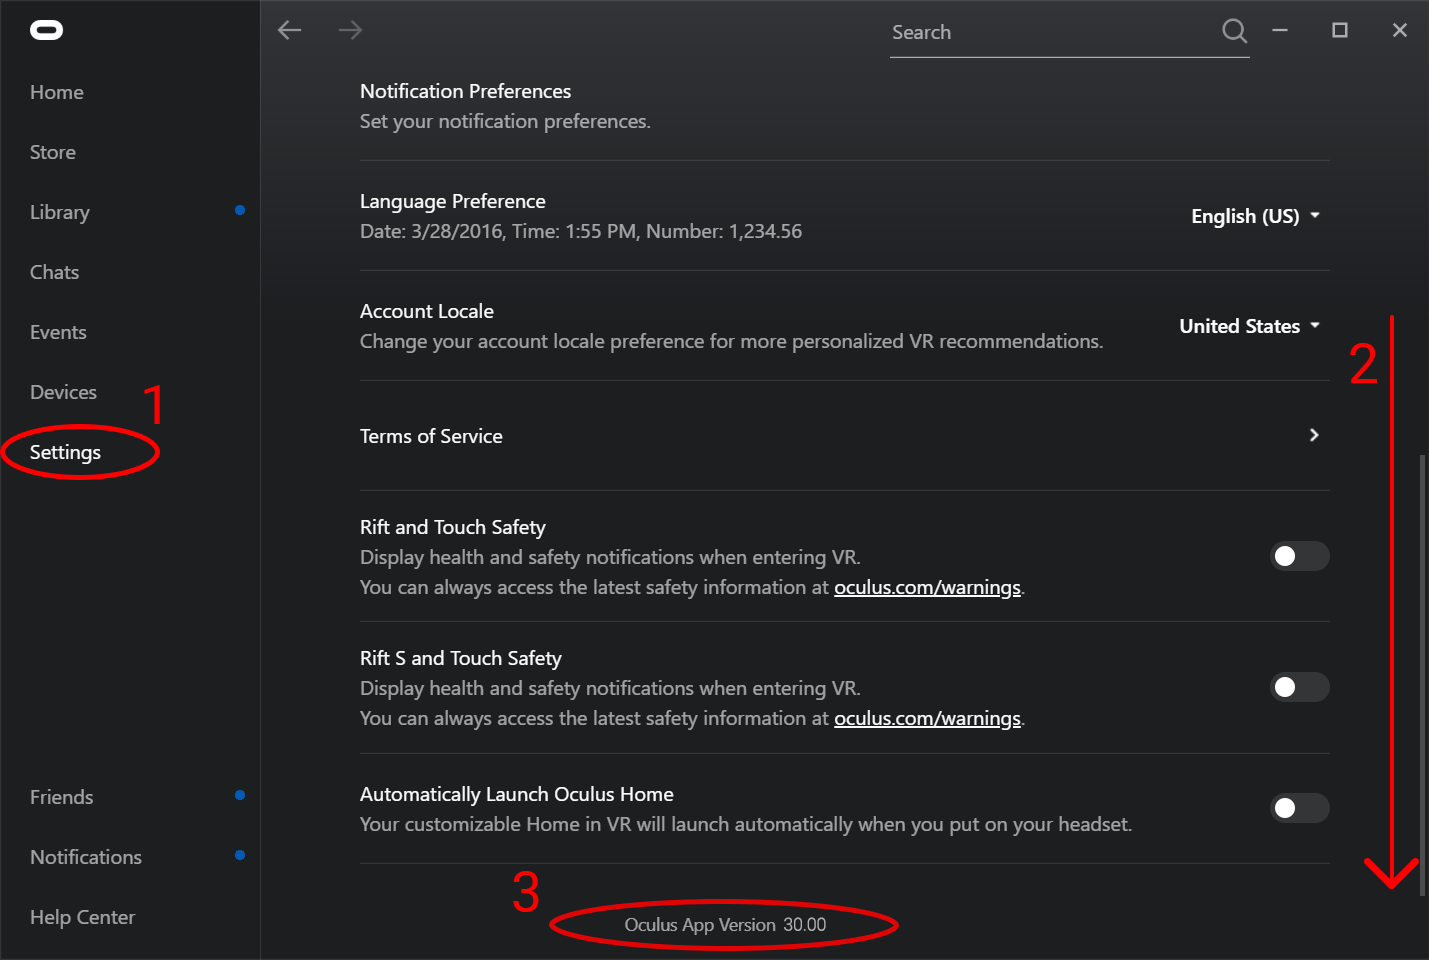
On Your PC
- On your PC, launch the Oculus PC app (if you don’t already have it installed, you can download it here)
- On the left side of the app, select Settings then go to the General tab
- Scroll all the way to the bottom of the General section where you will find the version number which should read 30.X or higher (it may be a very long version number, like 30.0.0.222.459…)
If you aren’t already on v30 or later, go to the Library section and then the Updates tab, you may see an ‘Oculus Software Update’ item in the list. Allow it to update and restart the software if prompted, then check again to see if you are on version 30 or later.
If you still aren’t on v30, go to the Settings section and then the Beta tab. Enable the Public Test Channel option, then return to the Library section and the Updates tab to see if an ‘Oculus Software Update’ appears. Allow it to install and then check your version number again to see if you’re on v30 yet.
Ok so you’re running the right version of the software and have activated Air Link on both devices. Now you’re ready to play. Here’s how:
On Your PC
- Launch the Oculus PC software
On Quest
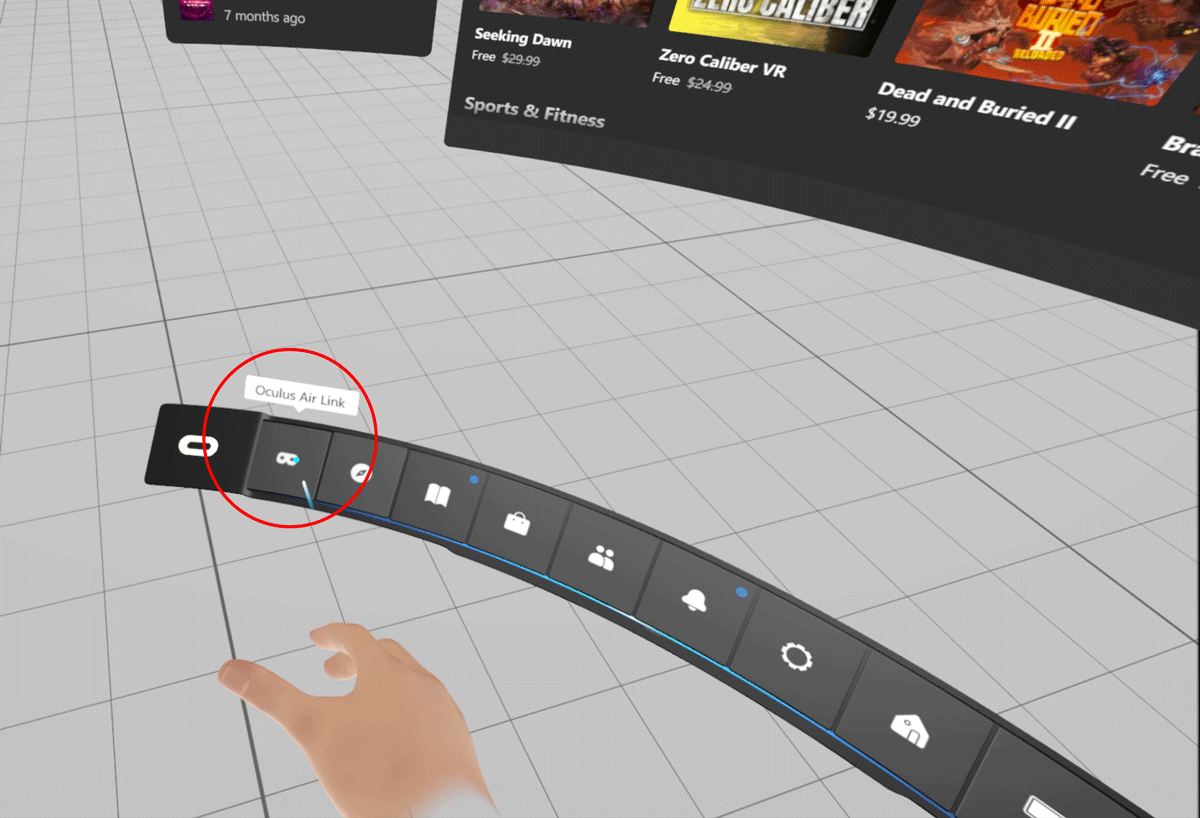
- In your Quest headset, click on the system clock in the menu bar to open the Quick Actions page
- On the left side of the Quick Actions page, click the Oculus Air Link button (you may be prompted with an ‘Air Link Requirements’ pop-up, read them then click Continue
- In the next dialogue select your computer under Available Computers and click Pair
- If you are prompted with a Pairing Code, go to your PC and click Confirm on the prompt
- Back inside your headset, select your PC again and then Launch
Once you are running Oculus Air Link you will find yourself looking at the Oculus PC dashboard called Oculus Dash. From here you can launch Oculus PC games directly from the Library tab (or launch them on your PC).
If you want to run SteamVR games first activate Oculus Link so that you can see the Oculus Dash. Then you’ll need to launch Steam on your PC and then launch SteamVR by clicking the VR icon at the top right of the Steam window. SteamVR should automatically detect your Quest, and when you put your headset back on you’ll find yourself looking at the SteamVR dashboard.
From here you can launch SteamVR games from the Library tab of the SteamVR dashboard (or launch them from Steam on your PC).
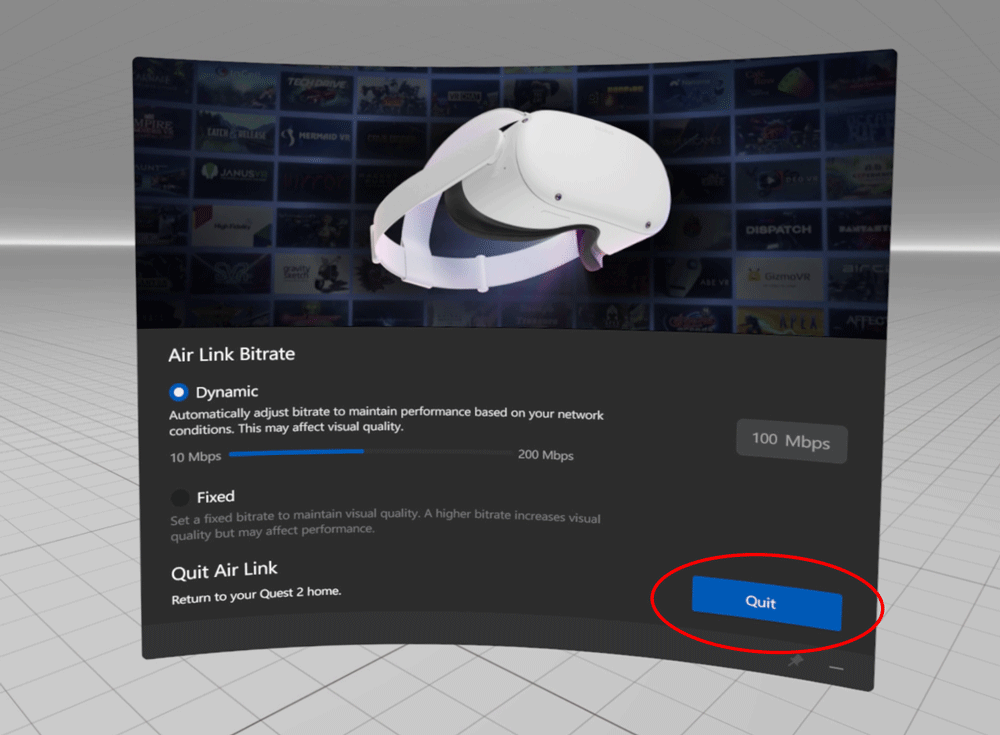
If you want to stop playing PC VR games on Quest, you can quit Oculus Air Link by opening the Oculus Dash menu (click the menu button on your right controller), then looking on the far left of the menu bar to find the Oculus Air Link section.