Did you know you can create your own mixed reality video on Oculus Quest and show off all your VR exploits to your adoring public? Oculus has published its own Mixed Reality Capture tool (MRC) to let you do just that.
Whether you’re creating content for YouTube, or simply want to capture your best moments in VR for all eternity, here’s a step-by-step guide on how to capture the sort of mixed reality video seen below.
It’s a lengthy process, but not difficult. Also, if you’re not into written instructions, check out Oculus’ own MRC video setup guide and OBS setup guide to get started.
What you’ll need:
Hardware
- Oculus Quest
- Compatible USB or HDMI Camera – Oculus suggests Logitech C920 or a GoPro
- Compatible Gaming PC – at least 16 GB of RAM, SSDs for storage space, and a GTX 1080 or higher
- Green Screen – make sure to have adequate lighting for solid green capture
- Wireless Router – recommended 5GHz
Software
- Mixed Reality Capture Tool – supports Windows PCs & macOS
- Mixed Reality Capture App (Quest) – free app
- Open Broadcaster Software – free app for recording video on desktop
- Video editing software of your choice
Firstly, not all Quest games are supported through MRC. The ones listed below are guaranteed to work however, but you may also find that other games in your library actually have support baked in. You’ll be able to test that out for yourself later, but you should stick to one of these titles first to make sure everything is working.
MRC Supported Quest Games
- Audica
- Beat Saber
- Dead & Buried 2
- Gadgeteer
- Kingspray
- Racket Fury
- Real VR Fishing
- Richie’s Plank Experience
- SUPERHOT VR
- Space Pirate Trainer
- Thrill of the Fight
Alright, now you know more or less what you need. Let’s put all of those pieces together.
Step 1: Set up the MRC Tool
- From your PC or Mac, download the Mixed Reality Capture Tool.
- Launch the app and click ‘Get Started’.
- Review the terms and conditions and click ‘Agree’.
- Click ‘Quest’ to begin setup. MRC won’t be able to find your Quest until you move on to step 2.
Step 2: Set up the MRC App on Quest
- Install the Mixed Reality Capture app on your Quest and launch it.
- Click ‘Search for Device’ in the MRC desktop tool. If the IP address is different on your computer than the one shown on your Quest, you can enter that IP address manually.
Step 3: Calibrate Your Camera
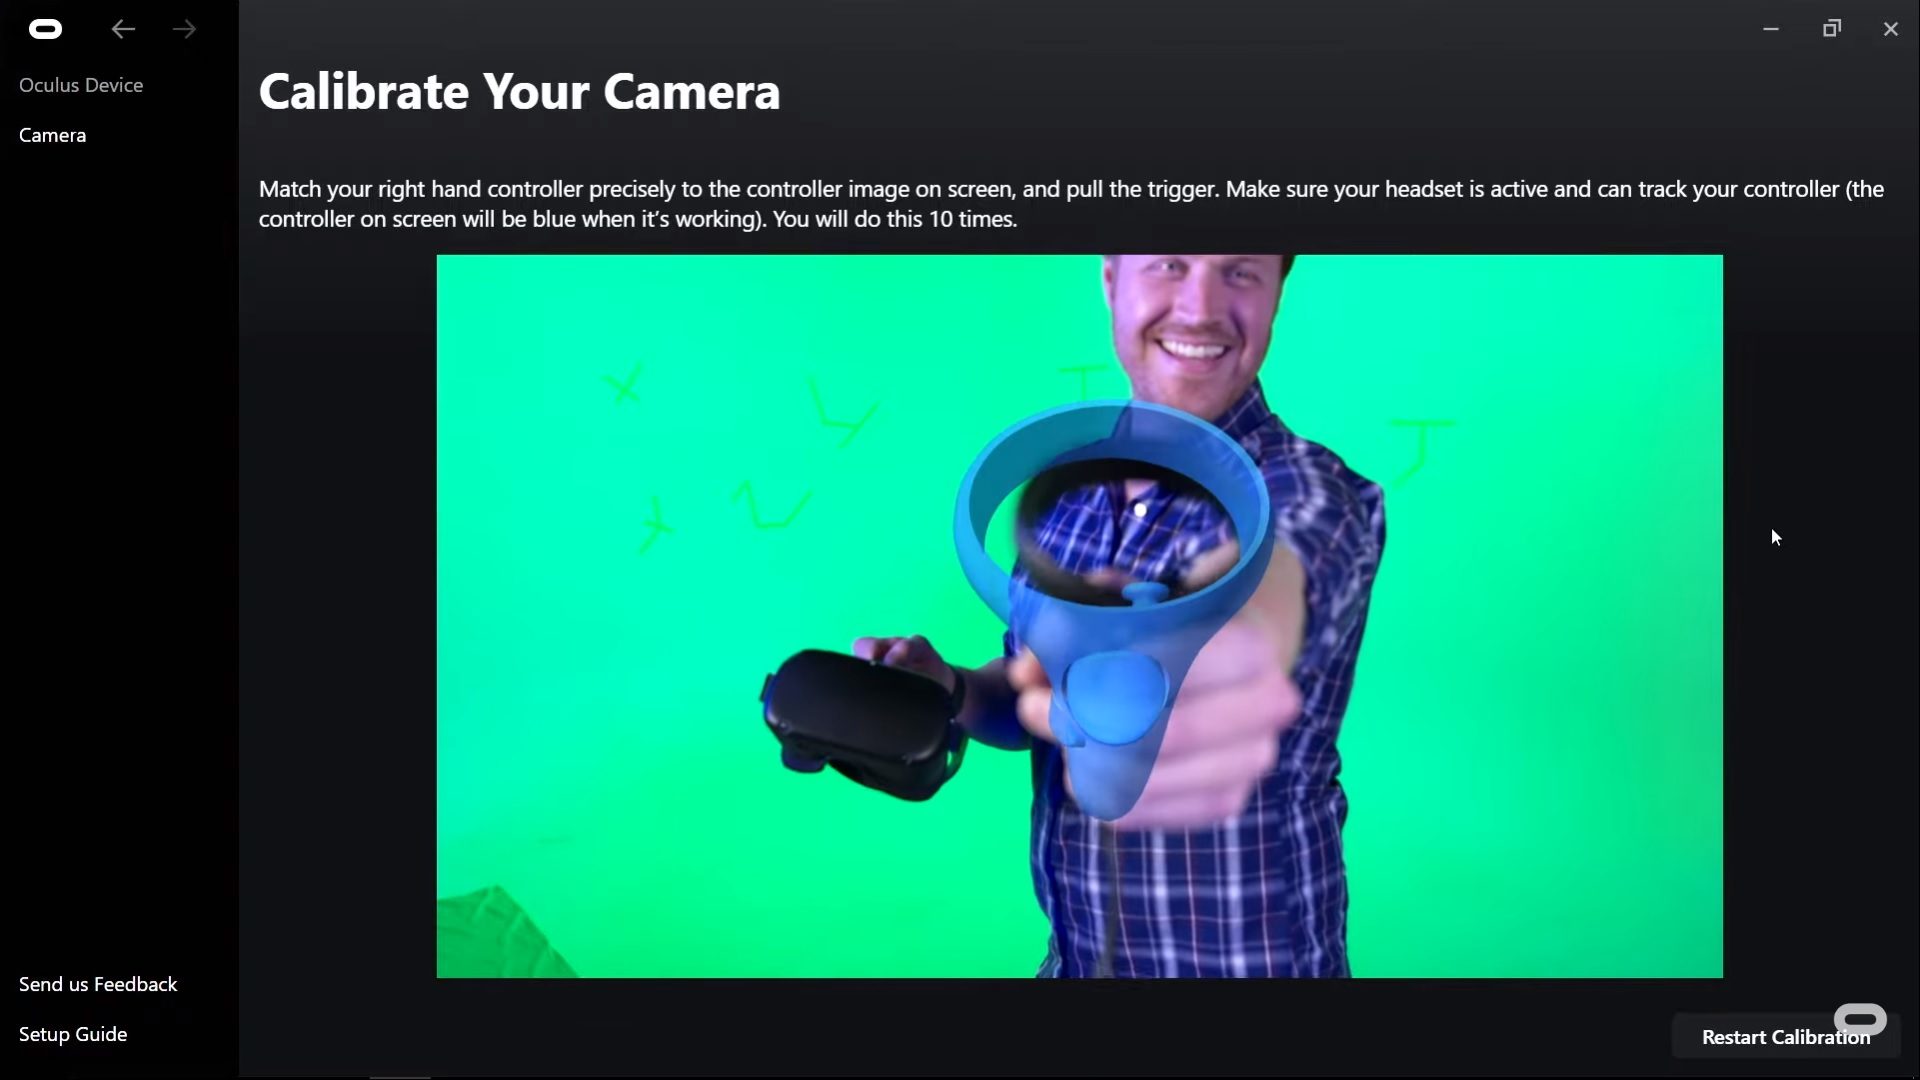
- Return to the desktop app. Once the device is found, click ‘Calibrate Your Camera’.
- Select your camera from the ‘Current Camera’ menu and then click ‘Begin Calibration’. This is where you’ll visually match up your Touch controllers to virtual, onscreen versions.
- Follow the onscreen instructions to calibrate your controller. Afterwards, you’ll get a chance to tweak things, so just try to get it more or less correct at this stage.
- Take some time to toggle through the extra settings, which let you manually reposition the virtual controllers to better match them up with their physical counterparts. Once you’re happy, click ‘Save to Headset’.
Step 4: Set up Open Broadcaster Software (OBS)
- Download and install the most up-to-date version of OBS.
- Return to the MRC desktop app, and you’ll find a link to an OBS plugin you need to download.
- Now import the plugin to OBS by going to Scene Collection -> Import and then navigate to the folder where you downloaded the plugin and select it.
- From the ‘Sources’ panel, click ‘Video Capture’ in the device layer to make sure your camera is turned on.
- Double click the Oculus Mixed Reality Capture layer in the ‘Sources’ menu. A blue and green split screen will appear.
- Go to your Quest and choose any of the supported games mentioned above.
- Return to OBS and click ‘Connect to the MRC-enabled game running on Quest’. Click ‘Ok’.
From here, you’ll have all the knowledge you need to start recording mixed reality footage of your VR exploits. Now go out and fire up Adobe Premier Pro and make something cool!