When Quest first launched in 2019, we called it the “first great standalone VR headset,” owing to it being a truly complete package between hardware, software, and content. And over the course of its life, we saw Quest improve over time with software updates that added new features and improved existing ones. And now we have Quest 2, which is pretty much the same headset, just better in (almost) every way.
Quest 2 is (just about) here! Facebook announced the headset and opened pre-orders today starting at $300. Oculus Quest 2 has a release date of October 13th.
But before owners of the original Quest look at their old headset with disdain, consider this. Quest 2 might be better in (almost) every way, but it really doesn’t do anything new. Quest 2 has effectively zero new features compared to the original, and Oculus says both headsets will share the same game library.
A quandary then… would Quest 2 have been better called ‘Quest S‘? Well yes, but also… no. As you’ll find throughout our review, a good chunk of Quest 2’s potential has not yet been unlocked. Similar to the original, Quest 2 will see improvements over time. In that sense, I think it would be fair to call it Quest S on day one, but once Oculus delivers some promised post-launch improvements, it’ll earn the name Quest 2.
Oculus Quest 2 vs. Quest Specs
Before we dive into the full review, here’s a breakdown of Quest 2 compared to Quest official specs:
| Quest 2 | Quest | |
| Resolution (per-eye) | 1,832 × 1,920 (LCD) |
1,440 × 1,600 (OLED)
|
| Refresh Rate | 90Hz | 72Hz |
| Processor | Snapdragon XR2 |
Snapdragon 835
|
| RAM | 6GB | 4GB |
| Battery Life | 2–3 hours | 2–3 hours |
| Controller Battery Life | 4x original | – |
| Field of View | Equal | Equal |
| IPD Adjust | 58mm, 63mm, 68mm | 58–72mm |
| Weight | 503g | 571g |
| Storage | 64GB or 256GB | 64GB or 128GB |
| Strap | Soft (rigid sold separately) | Rigid |
Now onto the full review… if you want to summary without the detail, skip to the very end for our conclusion.
Hardware
One of the most exciting but as of yet untapped bits of hardware in Quest 2 is the processor. While the original Quest launched with a dated (even at the time) Snapdragon 835, Oculus effectively picked the highest-end processor they could for Quest 2, the Snapdragon XR2. Not only is it significantly more powerful, it’s also a made-for-VR chip which includes some additional features that make it even better for use in a VR headset.
But it’s going to take some time until we see the XR2 really shining in Quest 2. On day one, Oculus says that Quest 2 will run have an ‘experimental’ 90Hz option which will run the headset’s main menu at that refresh rate. Games, however, will continue to run at 72Hz.
“Soon” after launch, according to Oculus, the company will make the 90Hz mode default for the main menu and also allow developers to take advantage of the extra refresh rate, but that may well require per-app updates.
The same thing applies to Oculus Link. On day one, if you plug Quest 2 into your PC to use Link, your PC VR content will run at 72Hz and have the same encoding quality as original Quest. “Soon” after launch, Oculus says, Quest 2 will be able to use Link at 90Hz and higher quality.
So it’s going to take some time before we see the full power of Quest 2.
The good news is that most games can automatically take advantage of Quest 2’s higher resolution, so that’s one benefit that you’ll see right out of the gate, and it’s a big one.
Display & Lenses
The leap in resolution and framerate are among Quest 2’s most meaningful improvements. Quest 2 has a per-eye resolution of 1,832 × 1,920 (3.5 megapixels) compared to the original’s 1,440 × 1,600 (2.3 megapixels). That’s a nice jump already, but there’s a bit of an extra boost because Quest 2’s LCD display has more sub-pixels—which fill in the ‘screen door effect’ even more—than Quest’s OLED display. On Quest 2, the screen door effect is basically invisible.
Pixels are too small to be seen individually; you can still see evidence of the underlying pixel structure against flat colors, but it fades away against anything textured.
The resolution difference is noticeable right away. Between the extra sharpness and the smoother motion of the 90Hz display, stepping up to the menu in Quest 2 feels a bit more real than with the original Quest.
As some know, the move from OLED to LCD comes with some downsides too. Most notably that LCD can’t get close to the deep blacks that OLED can. Although it doesn’t have those deep blacks of the original, it also has massively reduced smearing which is arguably a worthwhile tradeoff because higher resolution doesn’t mean much if you can’t keep pixels from smearing often.
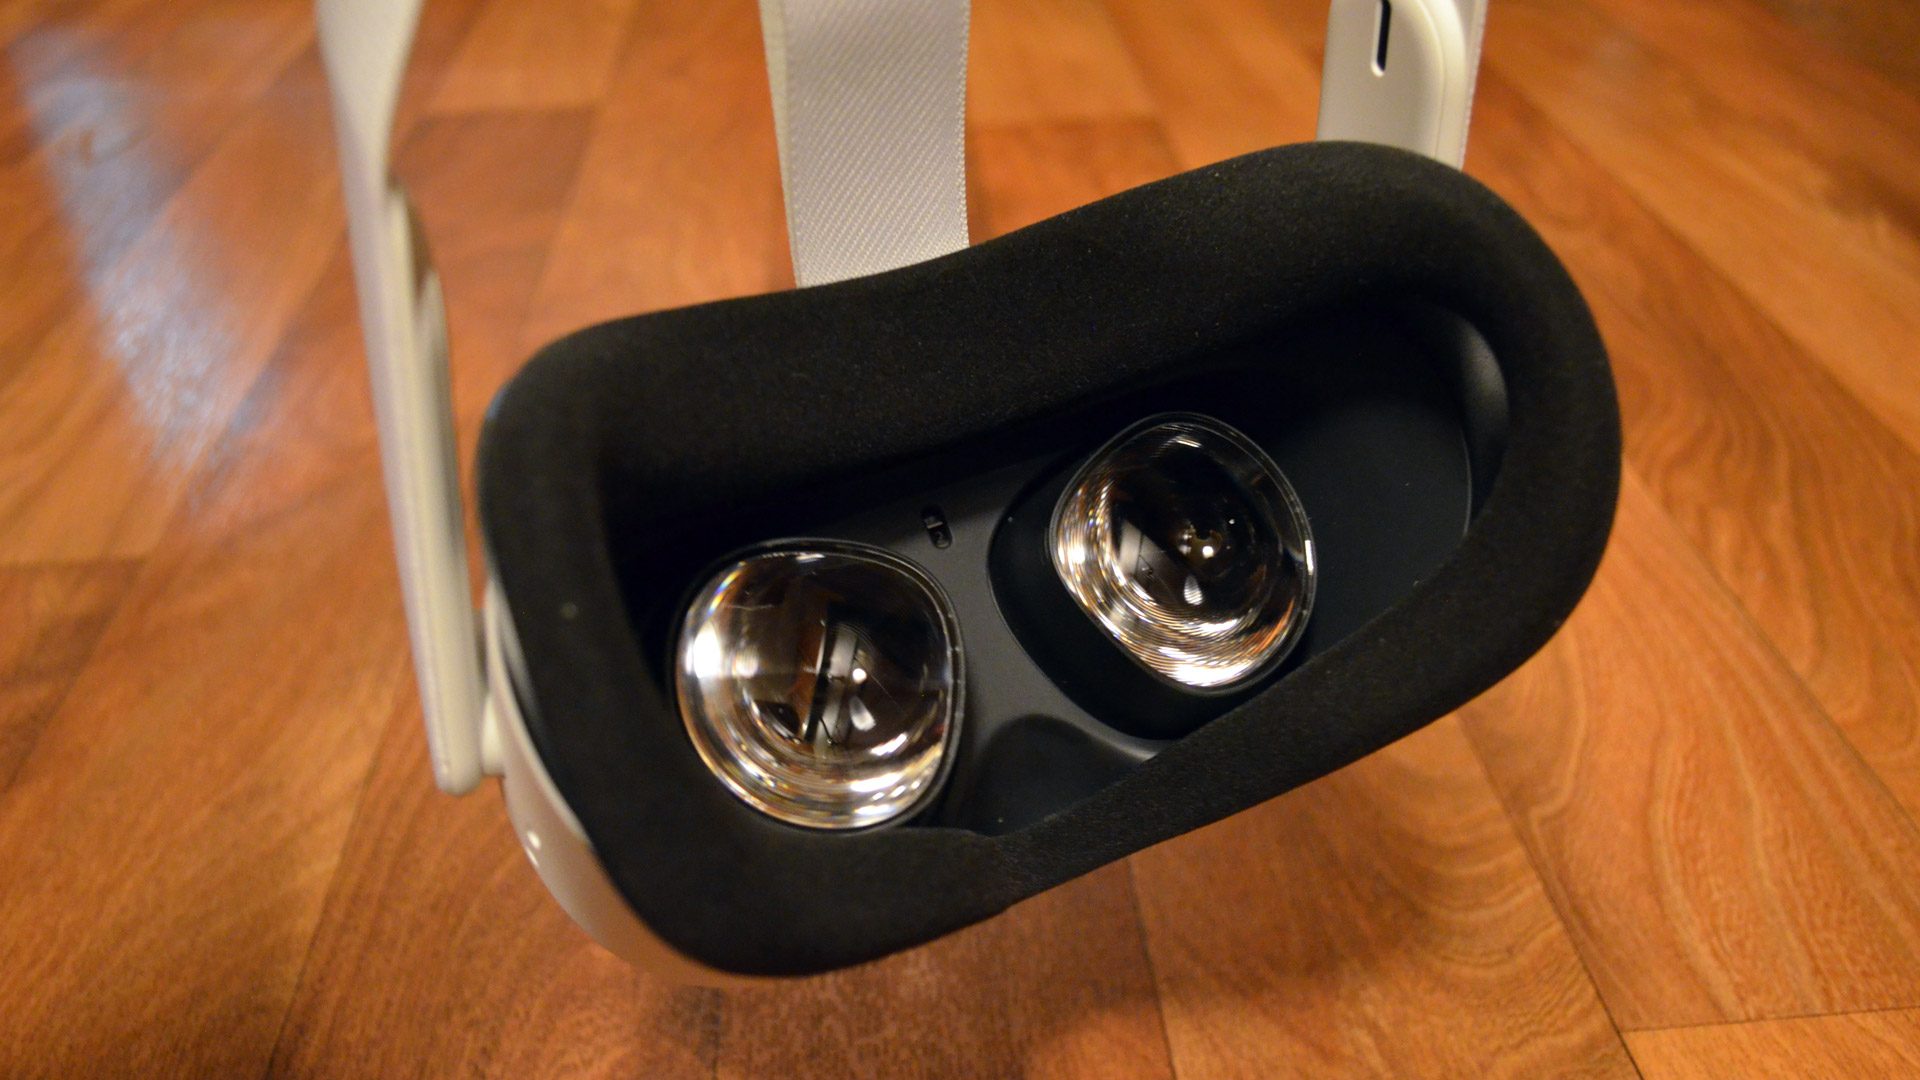
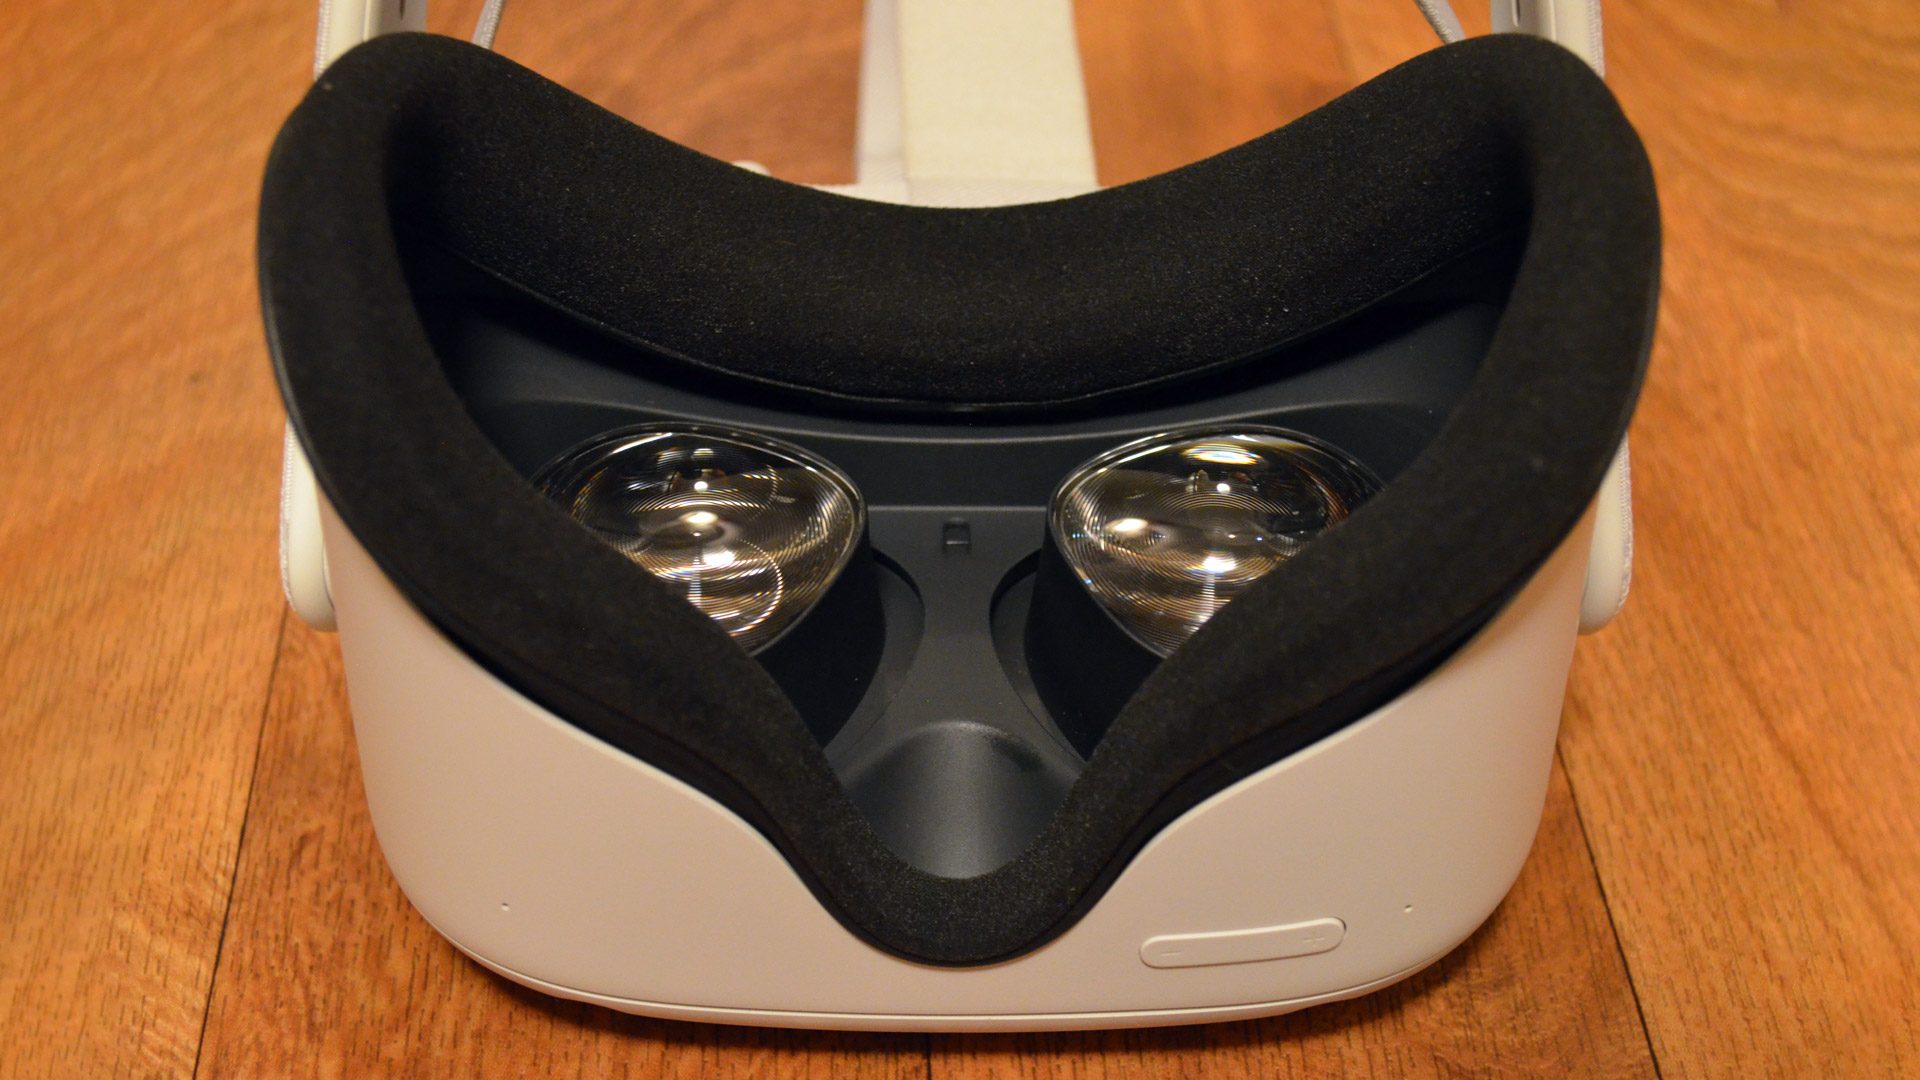
Quest 2’s lenses are effectively the same as the original. They’re fresnel as before, and have the same issues with ‘god rays’ as any modern fresnel lens (that is: annoying god rays on high contrast elements, but generally not to bothersome in most scenes). Oculus declined to share Quest 2’s official field of view, but said it is equivalent to the original Quest (that is: enough to be immersive, but more would still be nice). The ‘sweet spot’ or clarity across the lens, is roughly the same as the original Quest.
Quest 2’s lenses and display are tuned well. Chromatic aberration, pupil swim, and smearing are effectively invisible. Mura is almost invisible as well, but it’ll show up faintly against certain flat colors if you go looking for it.
IPD
Quest 2’s IPD can be physically adjusted between three positions: 58mm, 63mm, and 68mm. Rather than a slider on the bottom of the headset which allows you to adjust the IPD while looking through the lenses, to change the IPD on Quest 2 you need to remove the headset and grasp both lenses and tug them into one of the other positions.
Because of the delineated IPD adjustment, even if you’re within the minimum and maximum range, you could be up to 2.5mm out of the ‘ideal’ lens alignment (if you were to fall exactly between the available positions). We can infer that if Oculus felt being up to 2.5mm out of alignment was ok in the middle of the range, it would also be ok on the ends of the range—giving Quest 2 a ‘maximum recommended’ IPD range from 55.5mm to 70.5mm, which is pretty close to the original Quest’s ‘maximum recommended’ range of 56 to 74mm.
Since my IPD is roughly 63mm, I wouldn’t be able to see what the image looks like if it were 2.5mm off center (not with any reasonable precision, anyway). We’ll have to wait for more widespread feedback to know if falling between the three positions hampers the visual experience much, or if Quest 2’s eye-box is large enough to accommodate (clearly, Oculus felt this to be the case).
However, if you use the widest IPD setting you may see a bit of clipping of the field of view (this is a result of the single display design in which the lenses move closer to the edges of the display when adjusting for IPD).
Audio
Quest 2, like its predecessor, has hidden integrated speakers that allow audio to emanate from the headband. Even though the speaker openings are a bit closer, they’re still miles away from being centrally aligned with the ear, which makes them sub-par for accurate spatial audio.
In terms of sound quality and volume, Quest 2’s speakers feel right in line with Quest. Meaning the audio is passable, but a far cry from from the quality you’d hear from something like Index or even the original Rift CV1. For anyone coming from a Rift S at least, you’ll be happy to know that Quest 2’s audio is louder and of better quality.
Many games will do fine with Quest 2’s build in audio, but for games with especially good sound tech and design, you’ll miss out on a lot of added immersion without a better audio solution.
Although it’s a bummer to have to fumble with headphones to get that maximum immersion from Quest, at least the option to add your own audio is available thanks to the single 3.5mm audio input on the side (unlike original Quest, there’s only one 3.5mm audio input on Quest 2).
Design & Ergonomics
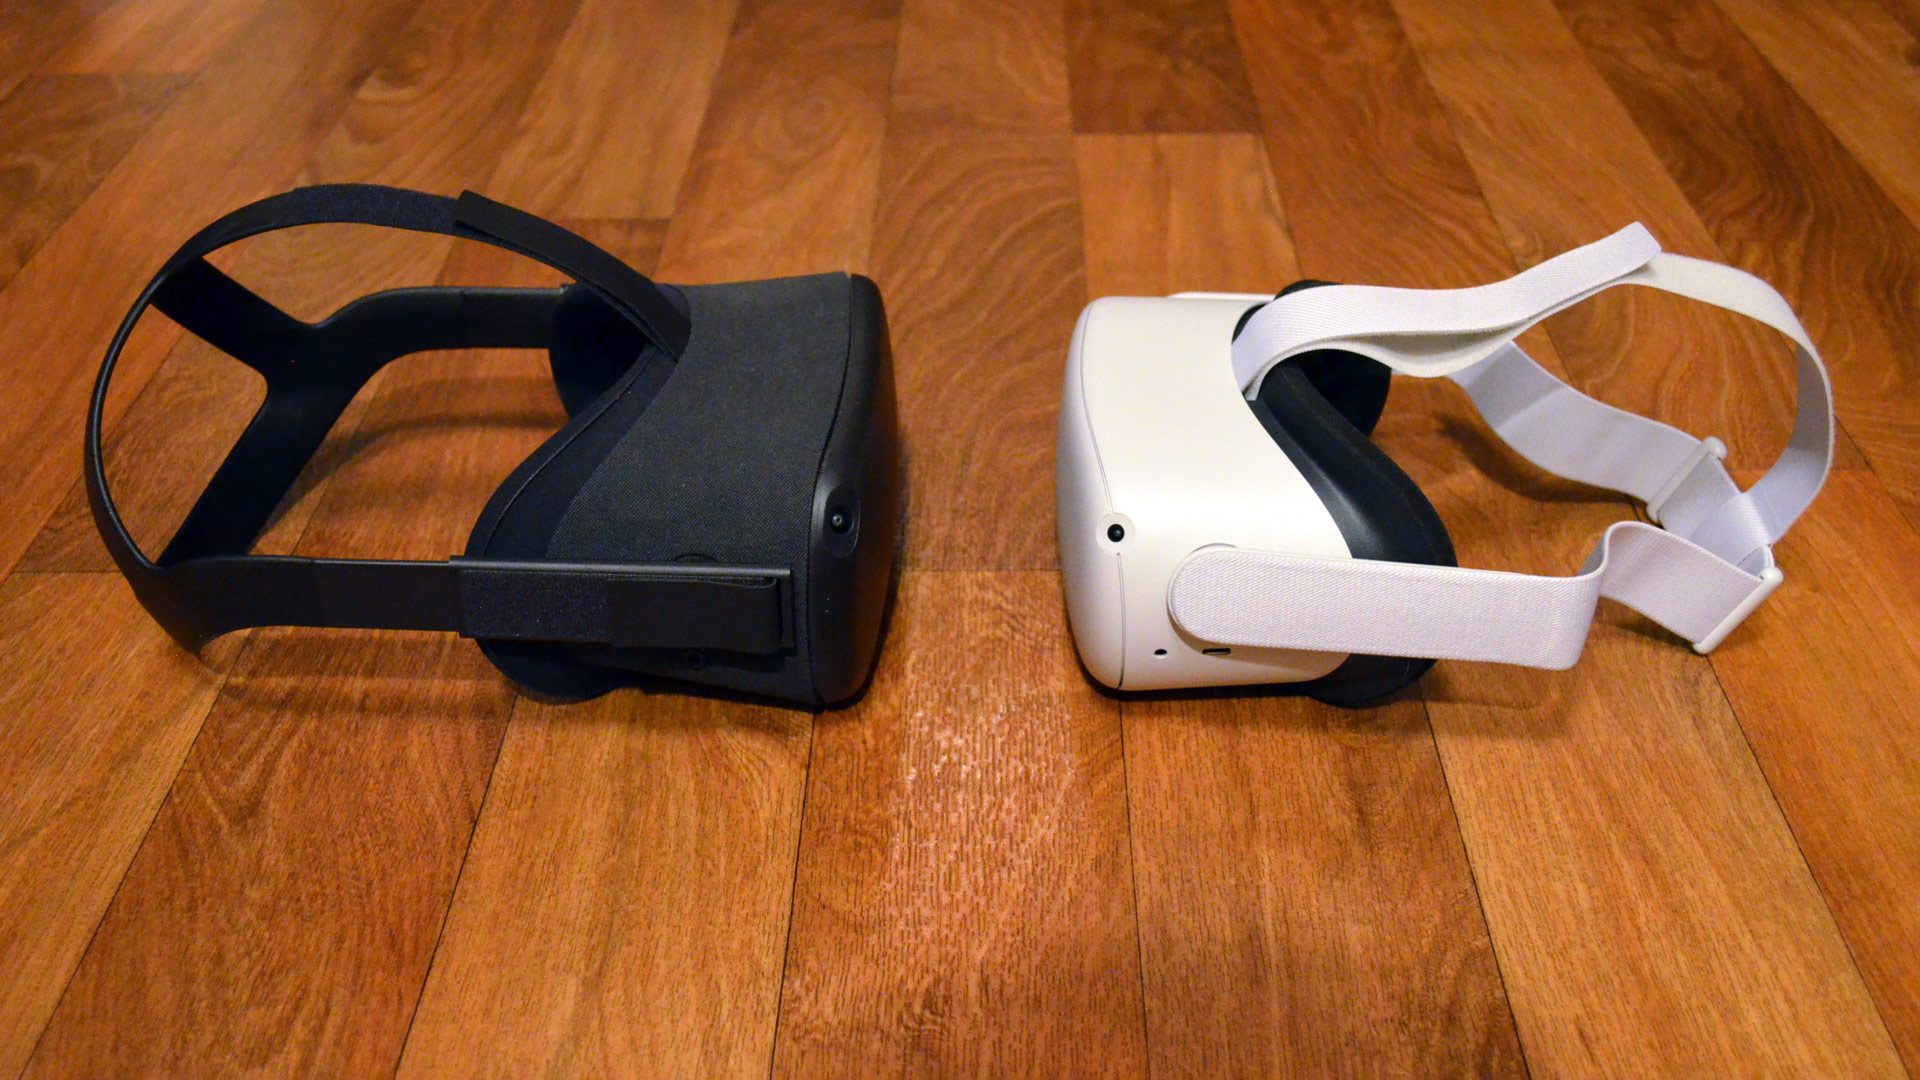
Quest 2’s design isn’t fundamentally different than its predecessor, but it does bring a number of refinements. In terms of size and weight, it’s a bit smaller and a bit lighter.
Quest 2 manages to look slightly less bulbous, if a bit less premium due to the all-plastic finish versus the fabric finish of the original.
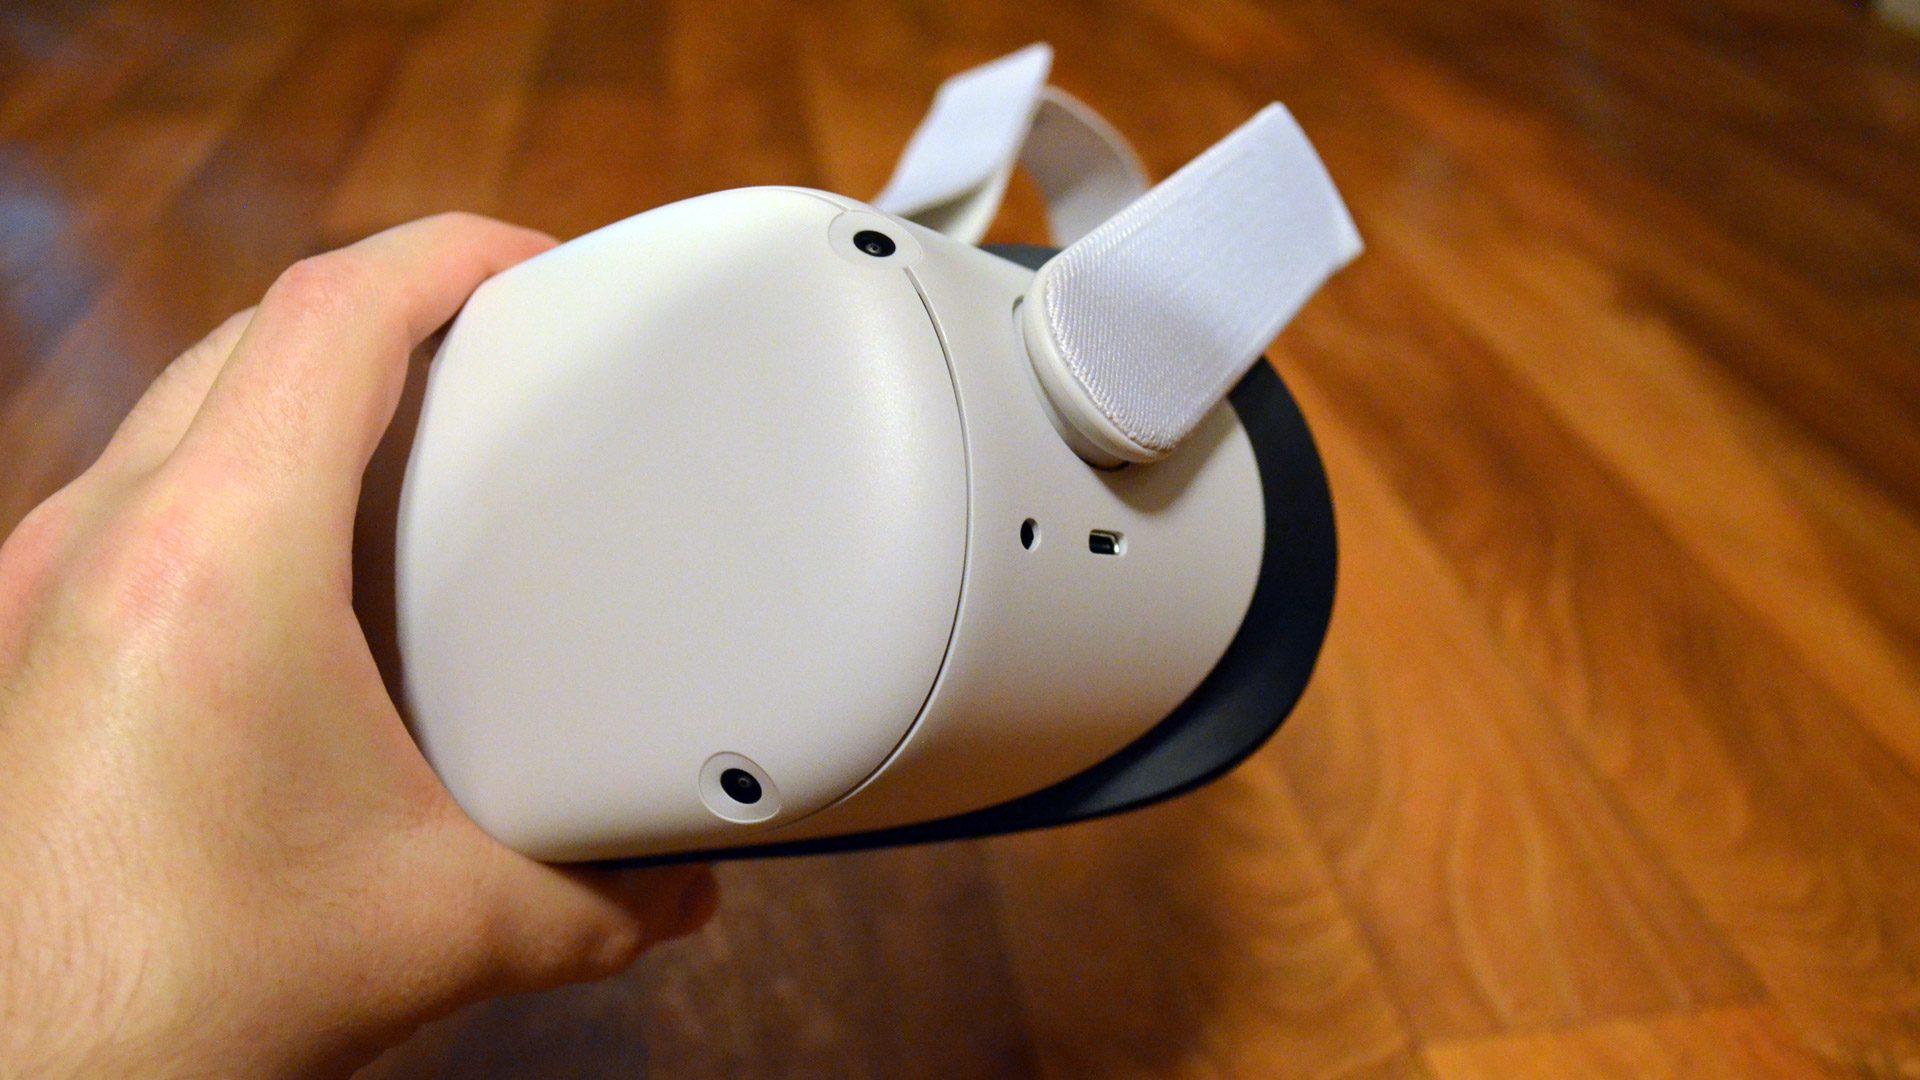
The minimal button and port layous are all effectively identical: a volume rocker on the bottom, USB-C charging & data port on the left next to a 3.5mm audio input, and a power button and LED power indicator on the right.
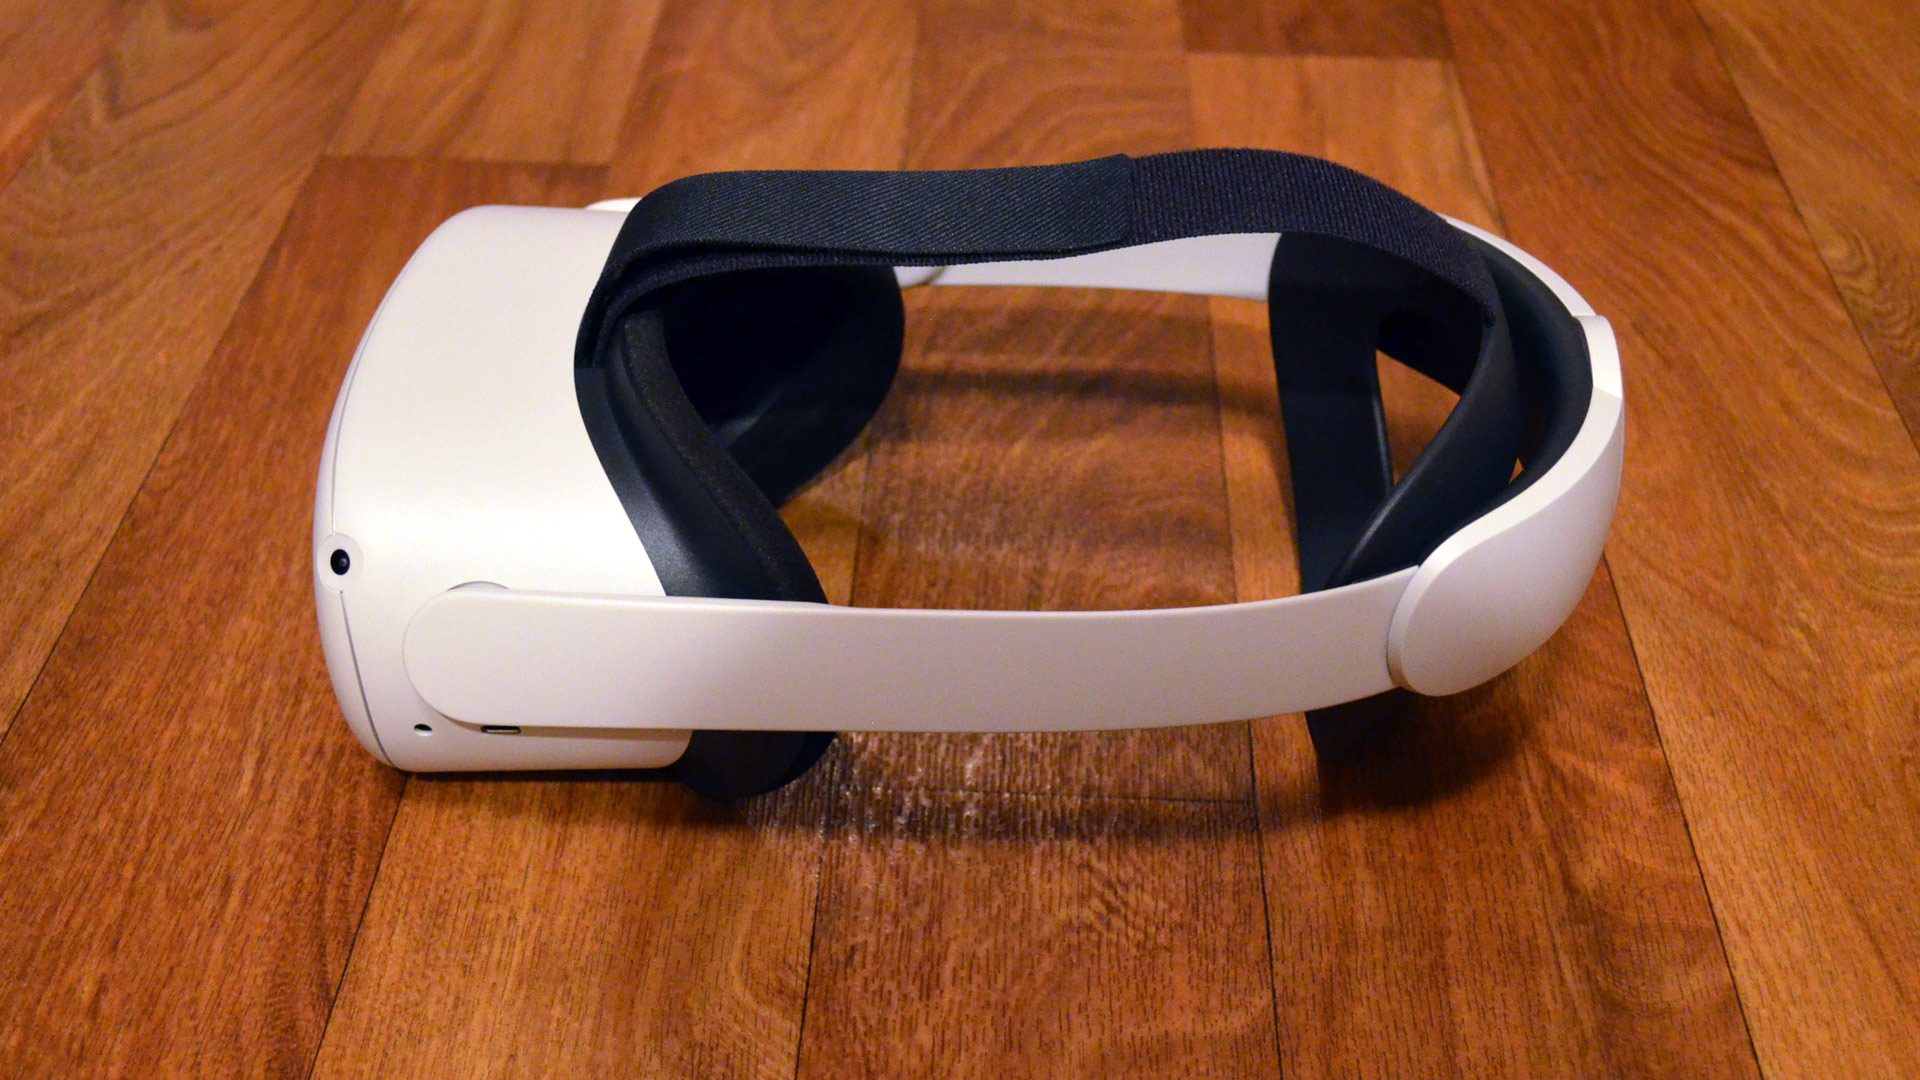
Soft Strap & Elite Strap
The biggest change to the design is the head strap. Out of the box you’ll get a soft strap which is, at least for my head, a bit of a downgrade over the original Quest’s rigid strap. Rigid straps have the benefit of gripping the back of your head and lifting weight off the front of your head via support from the top and side straps. Soft straps without any structure can’t do this nearly as well because they can only really support the front of the headset via the top strap and can’t grip the back of the head as well without a vice-like tightness. When I use the soft strap I find that there’s more pressure than I’d like on my forehead.
Now, this would be a bummer if not for the fact that Oculus is, finally, offering first-party ergonomic accessories, including an Elite Strap and an Elite Battery Strap, both of which are rigid and specifically designed with a counterweight (fingers crossed for an an Elite Audio Strap in the future).
The good news is that the Elite Strap design is excellent—I’d say Oculus’ best headstrap yet—which makes me really wish they just included it by default. It seems pretty clear that not doing so was largely a cost-saving decision.
For most serious VR users, I’m just going to go ahead and recommend you get the Elite Strap or the Elite Battery Strap on day one. Yes, it’s at least another $50 on top of the $300 base price, but it’s worth it.
Fit Pack
On top of the Elite Strap options, Oculus is also going to be selling a ‘Fit Pack’ ($40) which will include light blockers that fit around the lenses (to cover any light coming from the nose cavity) as well as two different face pads to accommodate wider or narrower faces. I haven’t had my hands on the Fit Pack, but found that the included face pad worked fine for me and I wasn’t bothered by any light leakage. It’s great that these accessories will be available though so a wider range of people can find an ergonomic fit that works for them.
Quest 2 also comes with a glasses spacer which holds the lenses a little further from your eyes so that there’s room for glasses in between. The face pad is slightly less wide than the original Quest, so especially wide frames might be problematic.
Controllers
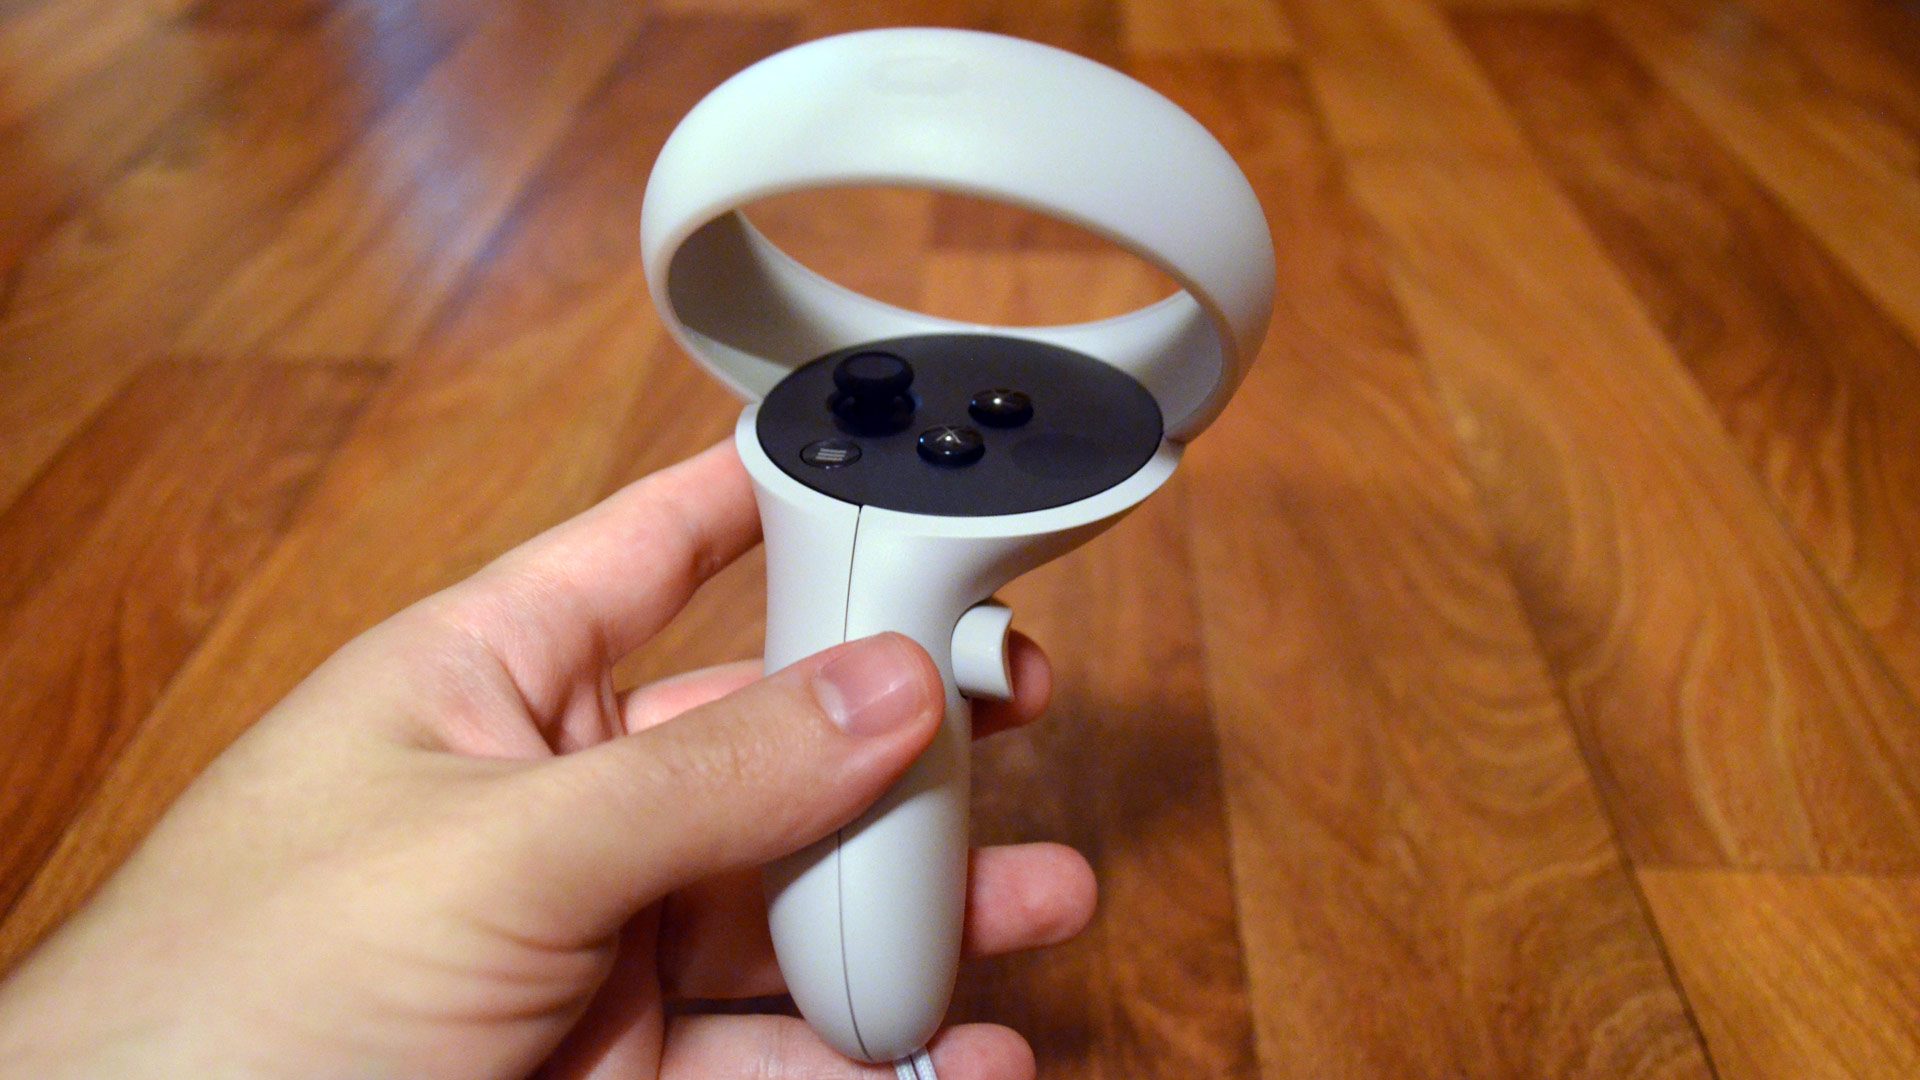
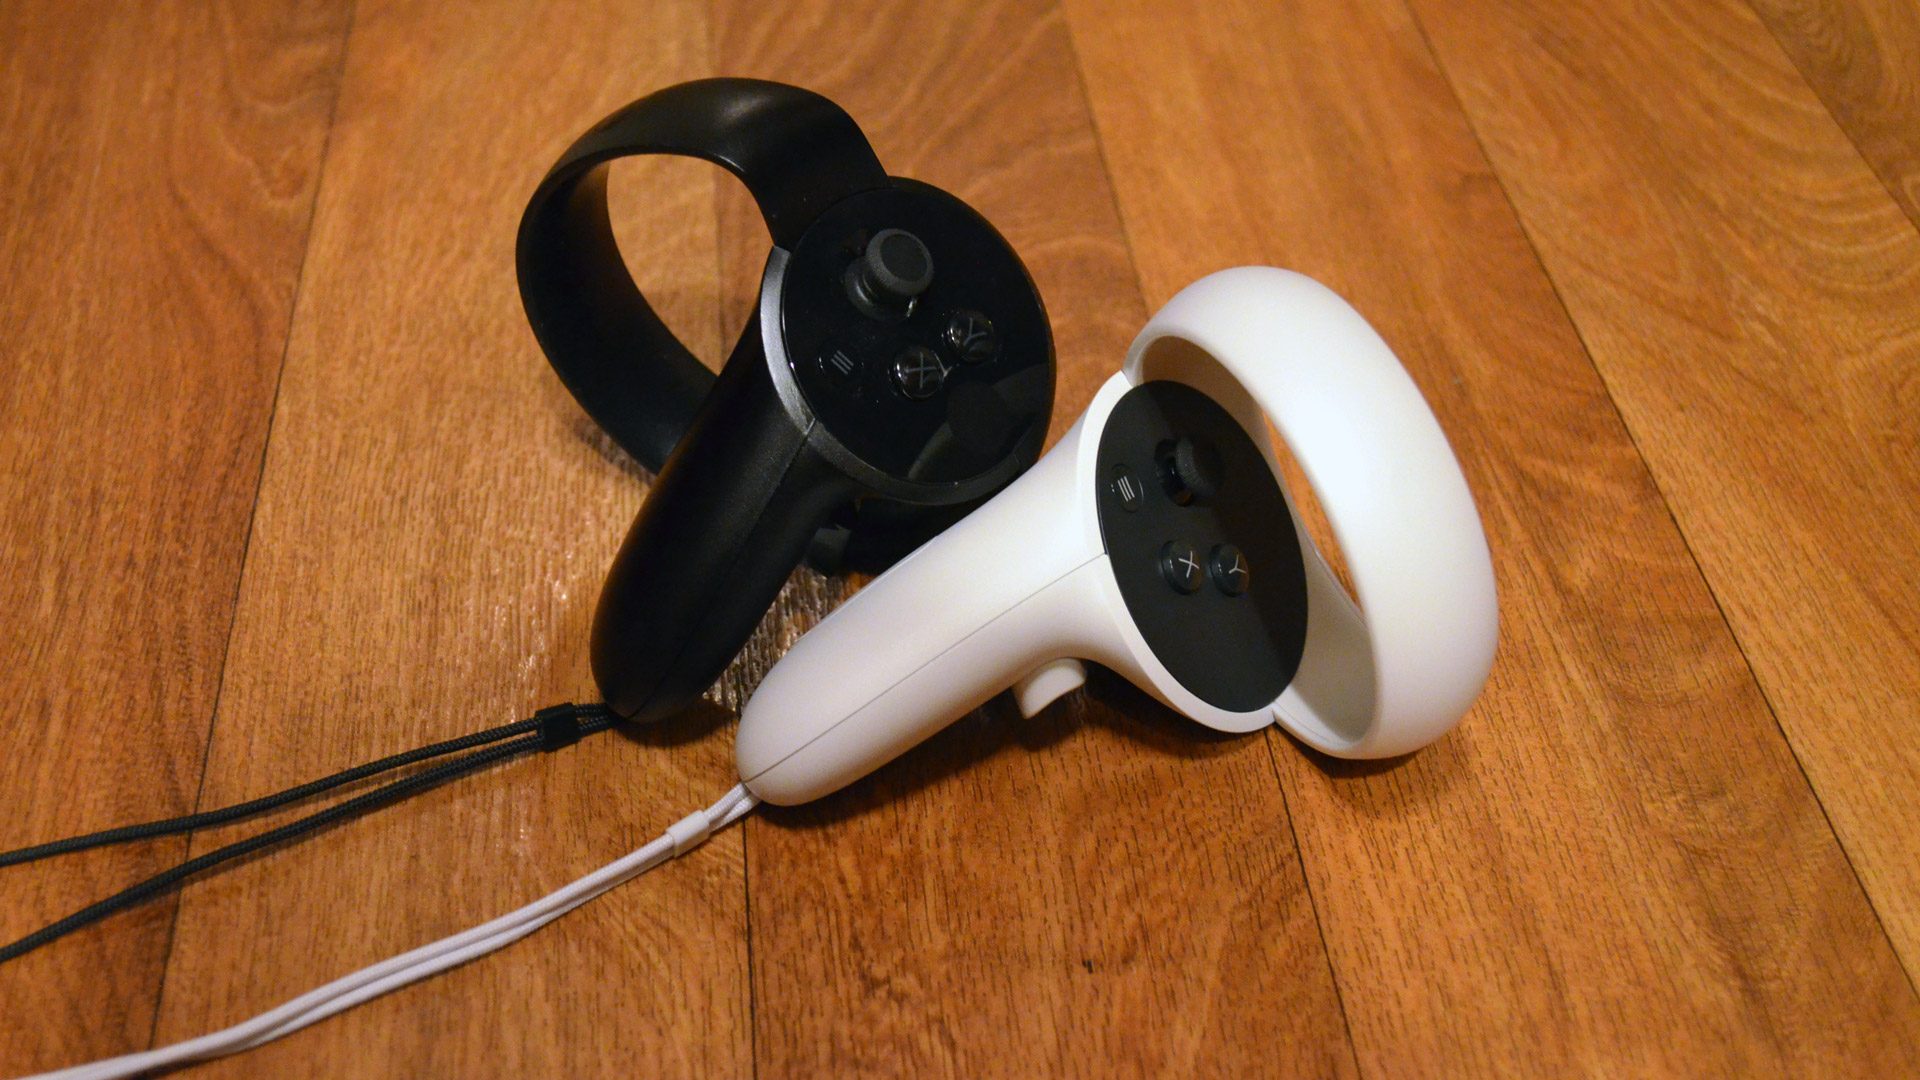
At first glance, Quest 2’s controllers might not look much different than the original Quest controllers, but they’ve actually seen a significant ergonomic redesign—or perhaps more of an ergonomic throwback. The ‘new’ controller design is very close to the Touch controllers of the original Rift CV1 headset. And that’s a great thing because they arguably had the best ergonomics of any VR controller to date.
Compared to the Quest controllers, Quest 2’s controllers are larger and feature a much larger, and offset ‘face’ which provides a natural area to rest your thumb without resting them on a button. The handle shape seems to fit into the hand a bit more purposefully too. The Quest 2 controllers are actually a bit larger than the original Rift CV1 controllers as well. For me that makes them slightly larger than ideal (but those with larger hands will surely feel the opposite). Even still, I think the ergonomic shift back toward the Rift CV1 controllers is a nice improvement.
And there’s another benefit hiding inside. The Quest 2 haptics are notably more powerful than their predecessors. We don’t yet know if they’re capable of some of the advanced haptic effects seen on the Rift CV1 controllers, but we expect to learn more about this soon.
Quest 2’s controllers are also now more power efficient and last up to four times longer than the original Quest controllers, according to Oculus. We’ll need to follow up on that claim because our controller batteries have yet to run out!
Unfortunately Oculus has confirmed that Quest 2 controllers are not compatible with Quest or Rift S.
IPD Adjustment
I already talked about the IPD adjustment up in the hardware section, but there’s a design element that needs to be talked about as well.
I’m glad Quest 2 has an IPD adjustment, even if it can only be moved between three discrete settings (58mm, 63mm, and 68mm). However, the approach is a bit baffling. Rather than a slider on the bottom of the headset which allows you to look at the image as you adjust the IPD, on Quest 2 you need to remove the headset, grab the lenses, push them into one of the other positions, and then put the headset back on.
Given that the different settings are simply labeled 1, 2, and 3—and that there’s seemingly no guidance for the user about which position they should select—I don’t see how users are expected to set their IPD correctly. Even if you could do it by sight, the need to remove the headset, change the lens position, then put it back on means you can’t look at the image as you adjust it, which makes it far harder to set by sight. And even if you’re a VR enthusiast and actually know your own IPD measurement, you have to remember which numbered setting corresponds with which measurement.
Unless I’m missing something, this is a strange approach to IPD adjustment and one which I doubt will result in the majority of users using the correct setting.
Continue on Page 2: Tracking & Experience »
Page: 1 2