The Oculus Team have published a detailed guide on Roomscale VR setup. This four-part series expands on the Experimental Roomscale Guide published before the launch of the Touch controllers, discussing sensors, bandwidth, host controllers and extra equipment.
While Oculus continues to recommend the two-forward-facing sensor configuration for Touch users and developers, many people are trying roomscale solutions, using two or three sensors to achieve 360 degree tracking. An Experimental Roomscale Guide was published before the Touch launch in December, and now the Oculus Team have taken a deeper dive into roomscale configuration, posting a four-part series on their official blog.
‘Tips for Setting Up a Killer VR Room’
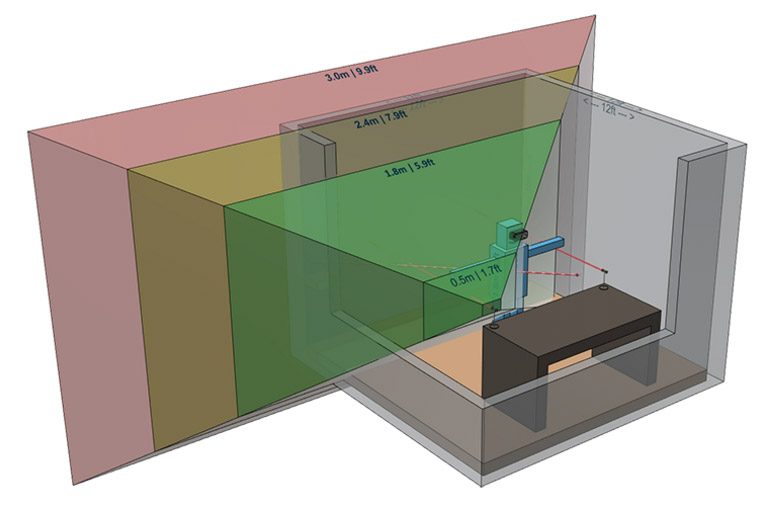
A fourth sensor is possible, but “can create more technical and performance issues than it’s worth,” the company says. Part One of the company’s roomscale guides further explores the Sensor’s tracking range and ideal layouts.
‘Balancing Bandwidth on USB’
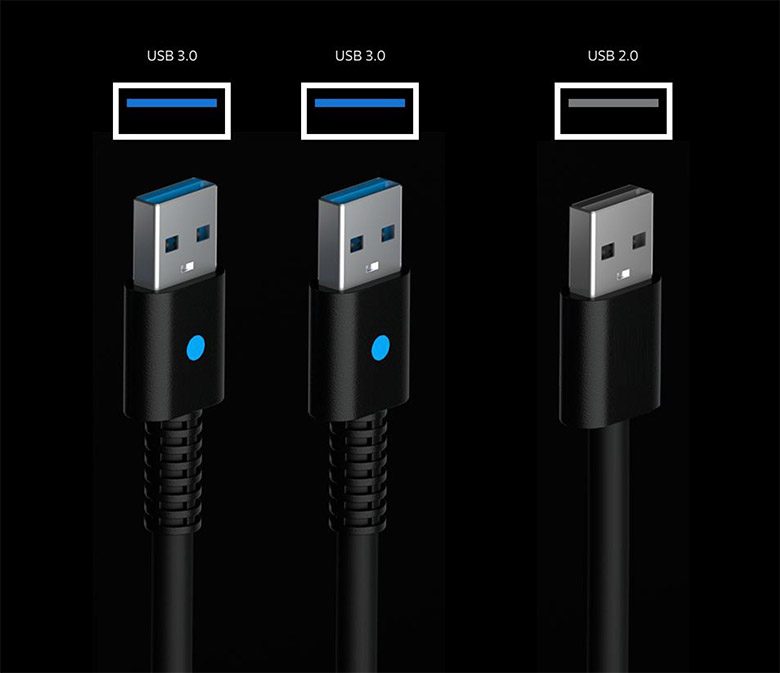
Next up, something that most PC users never need to worry about: balancing bandwidth on USB. The combined data from three Oculus sensors has the potential to overload a USB host controller, which is why they recommend using two sensors on USB 3.0 and one on USB 2.0.
Not all motherboards behave the same way, but it is likely that more than two sensors plugged into either 3.0 or 2.0 will cause tracking issues. The team also doesn’t recommend using USB hubs for the sensors. Part Two goes over more details about the limitations of USB throughput with regards to Sensor usage.
‘Identifying Host Controllers’
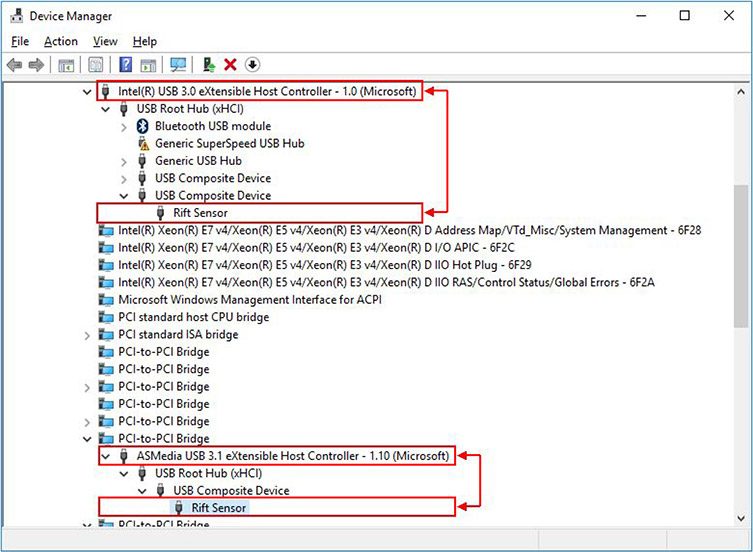
If you’re experiencing bandwidth issues and want to know more about your host controllers, Part Three in the series explains how to access the information in Windows Device Manager. Once you’ve found the sensors, you can view devices ‘by connection’, allowing you to see the connected host controller, and its position in the hierarchy.
It may help to spread out multiple sensors across different host controllers, and the Device Manager allows you to visualise what is really happening when you plug the sensor into another random USB port at the back of your PC.
‘Extra Equipment’
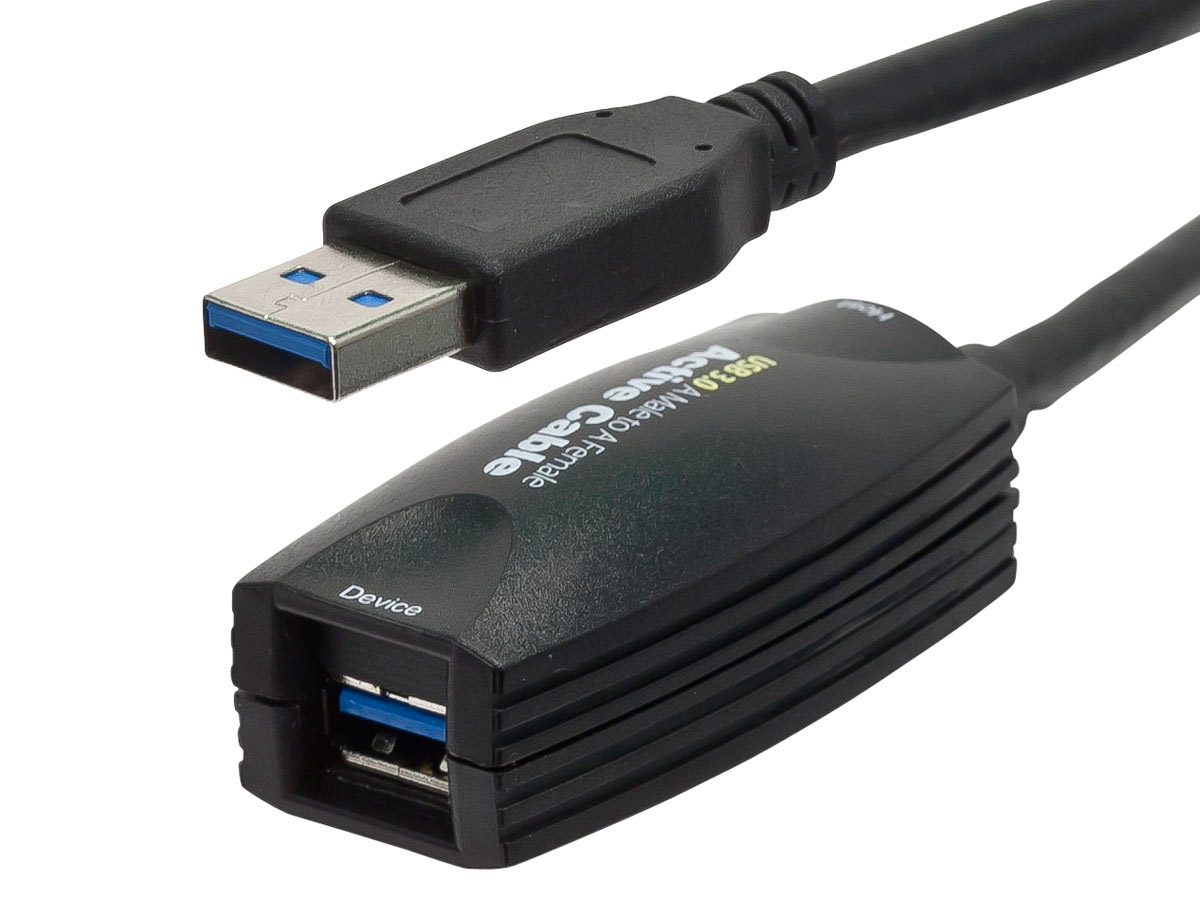
Finally, in Part Four, they discuss extra equipment, such as extension cables and wall mounts for those who want to do something other than desk or tripod mounted Sensors. USB extension cables vary in quality and can cause problems, so the team has listed a few options that have worked for fellow enthusiasts.
One tip is that it might be a good idea to use USB 2.0 for a sensor that needs to be placed particularly far away from the PC, as the lower bandwidth tends to work more reliably with longer extension cables. Some PCI Express USB cards are also recommended, as these work around the potential host controller issues.
In addition, they also recommend some USB and HDMI extension cables for the Rift headset, and suggest wall tripod mounts from Amazon marketplace or to go the 3D-printing route.
– – — – –
While most of this information shouldn’t be too daunting for a VR early-adopter, when it comes to mainstream consumers, it’s an apt illustration of why Oculus were reluctant to discuss roomscale, and how Vive’s approach to tracking is particularly well suited for roomscale VR.