4. Add Lenses
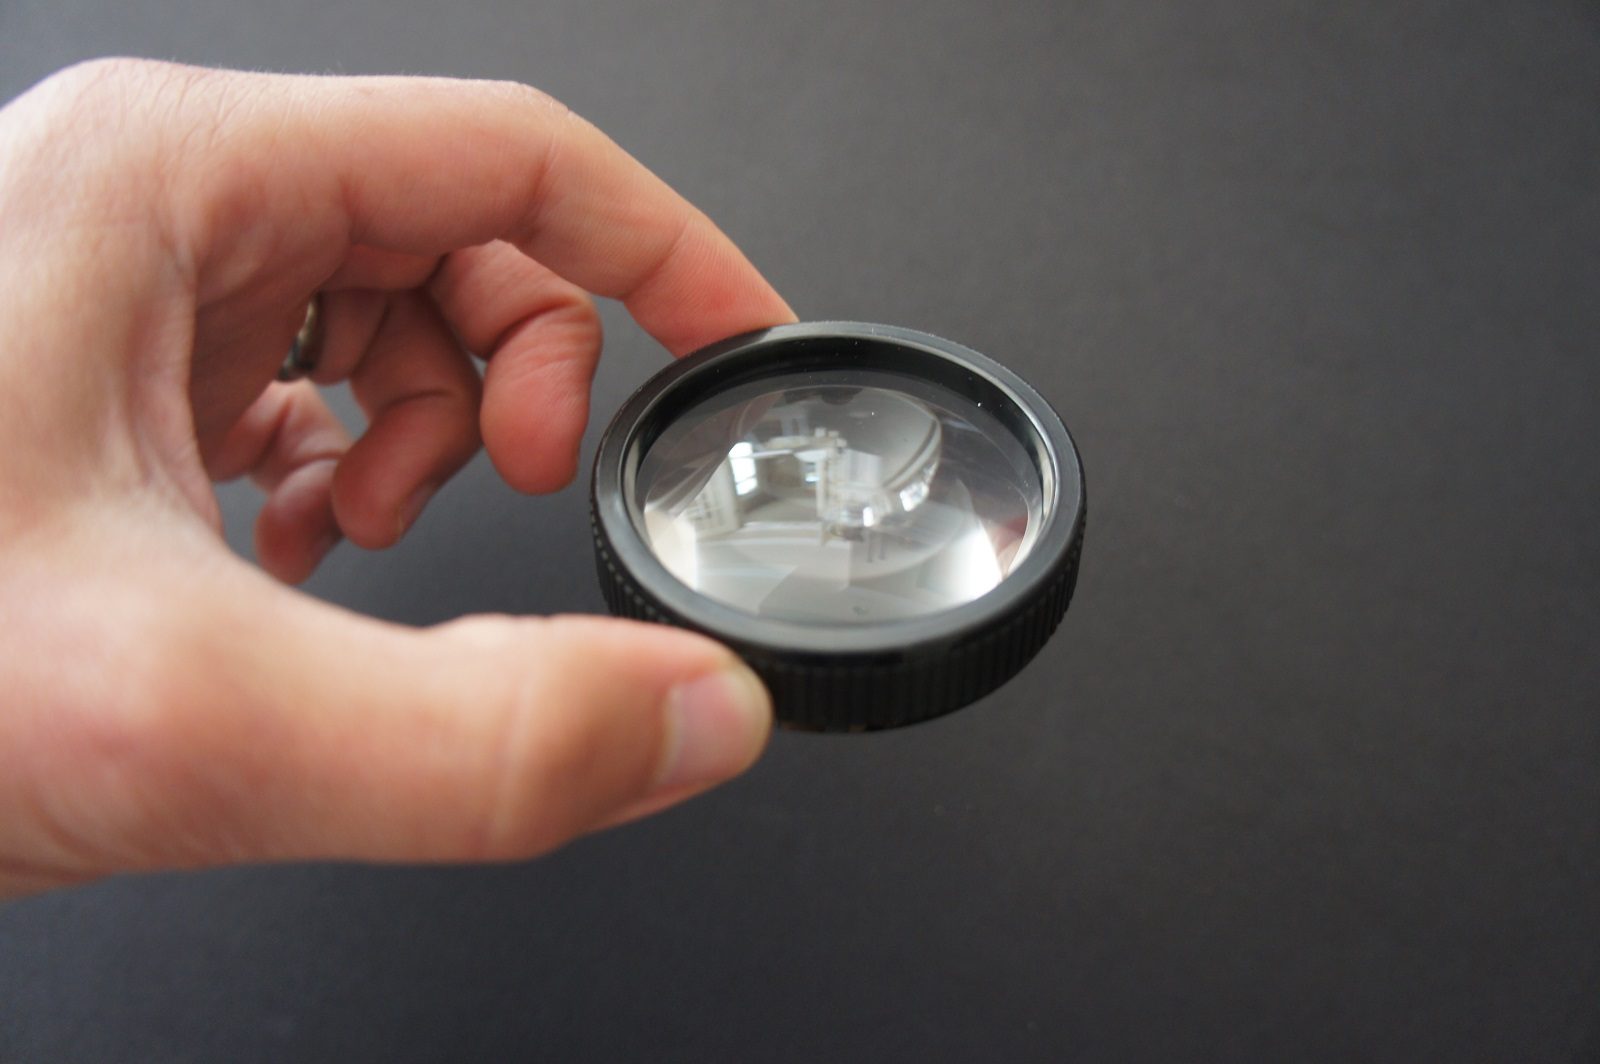
Top view of the lens:
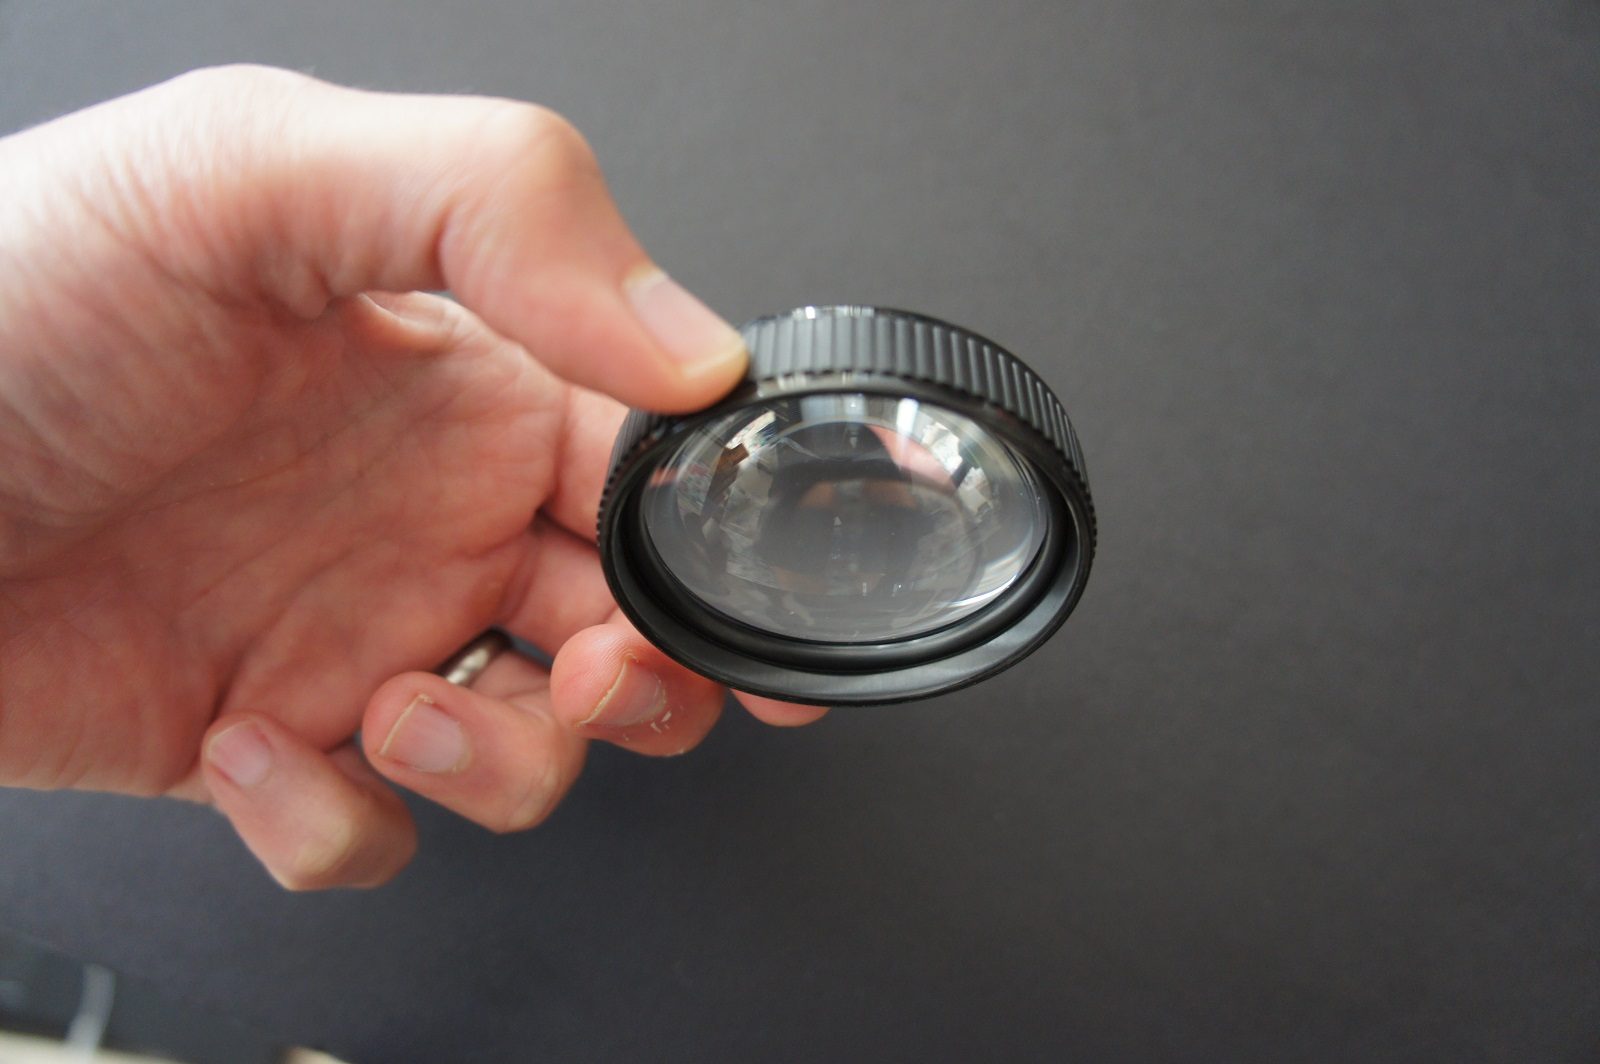
Bottom view:
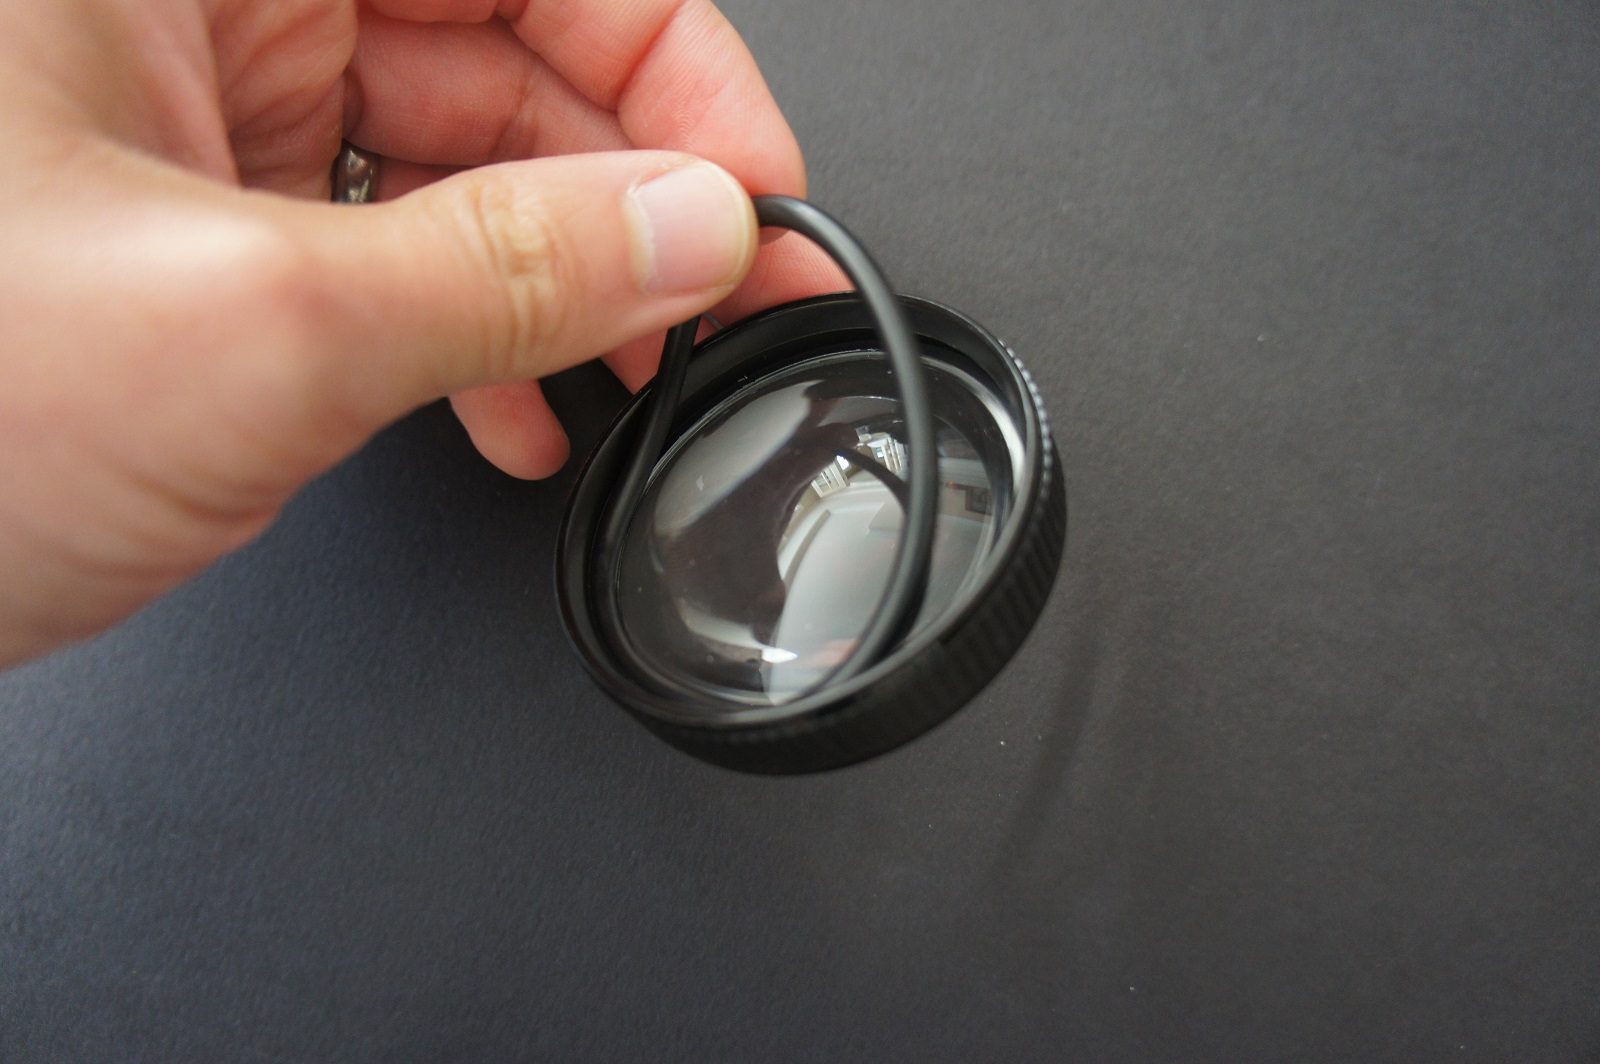
To separate the acrylic lens from its harness, simply remove the thin rubber ring that keeps it in place. After that you should have no problems setting the lens free:
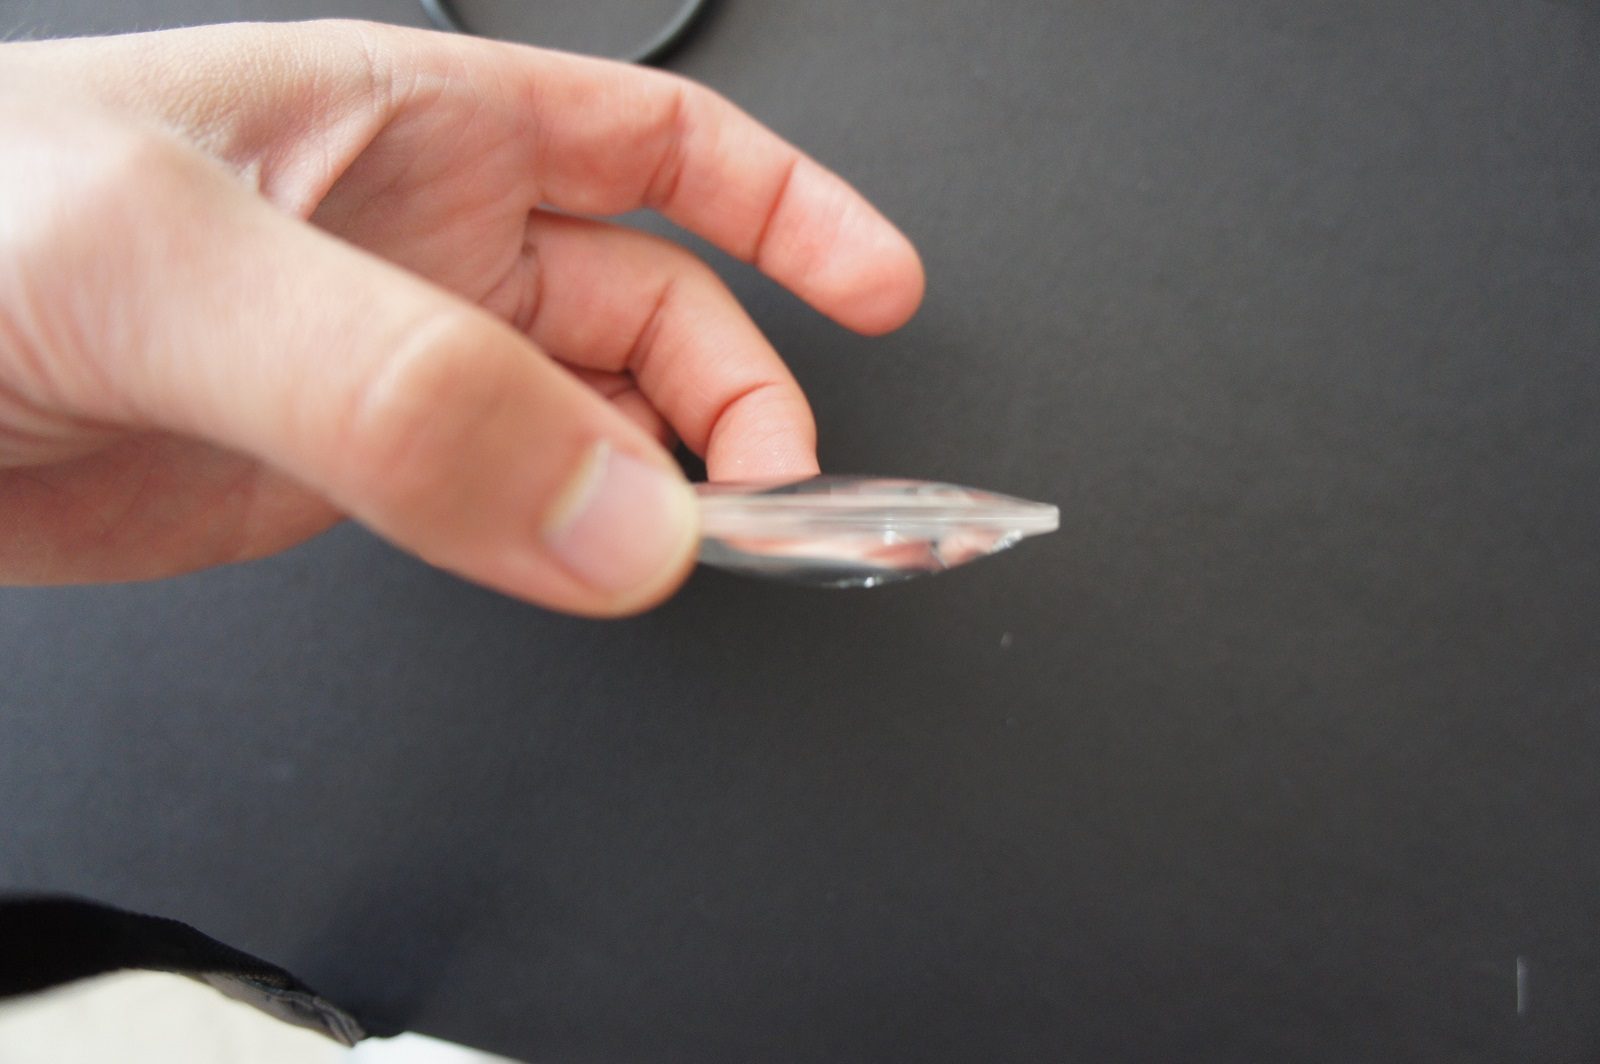
Now take a minute to look at the lens’ profile. You will notice that one side is rounder and ‘fatter’ than the other. Keep that in mind for the next step because the rounder side should face the LCD screen and the thinner side should face your eyes:
Next lay the foam-core case cutout so the two holes for the eyes are at the bottom and all v-cut fold lines are facing down. If you try to stick your face to the case as it is, you will notice that you are missing a cut out for your nose and now it is a good time to add one!
We are going to tape the lens in place next, first put both lenses on top of the circular holes, with the “fat” side of the lenses facing down. Once the lenses are in place, you can use two pieces of painter’s tape, one on each side of each lens, to hold them in place.
Here is what the case should look like with the lens taped in place:
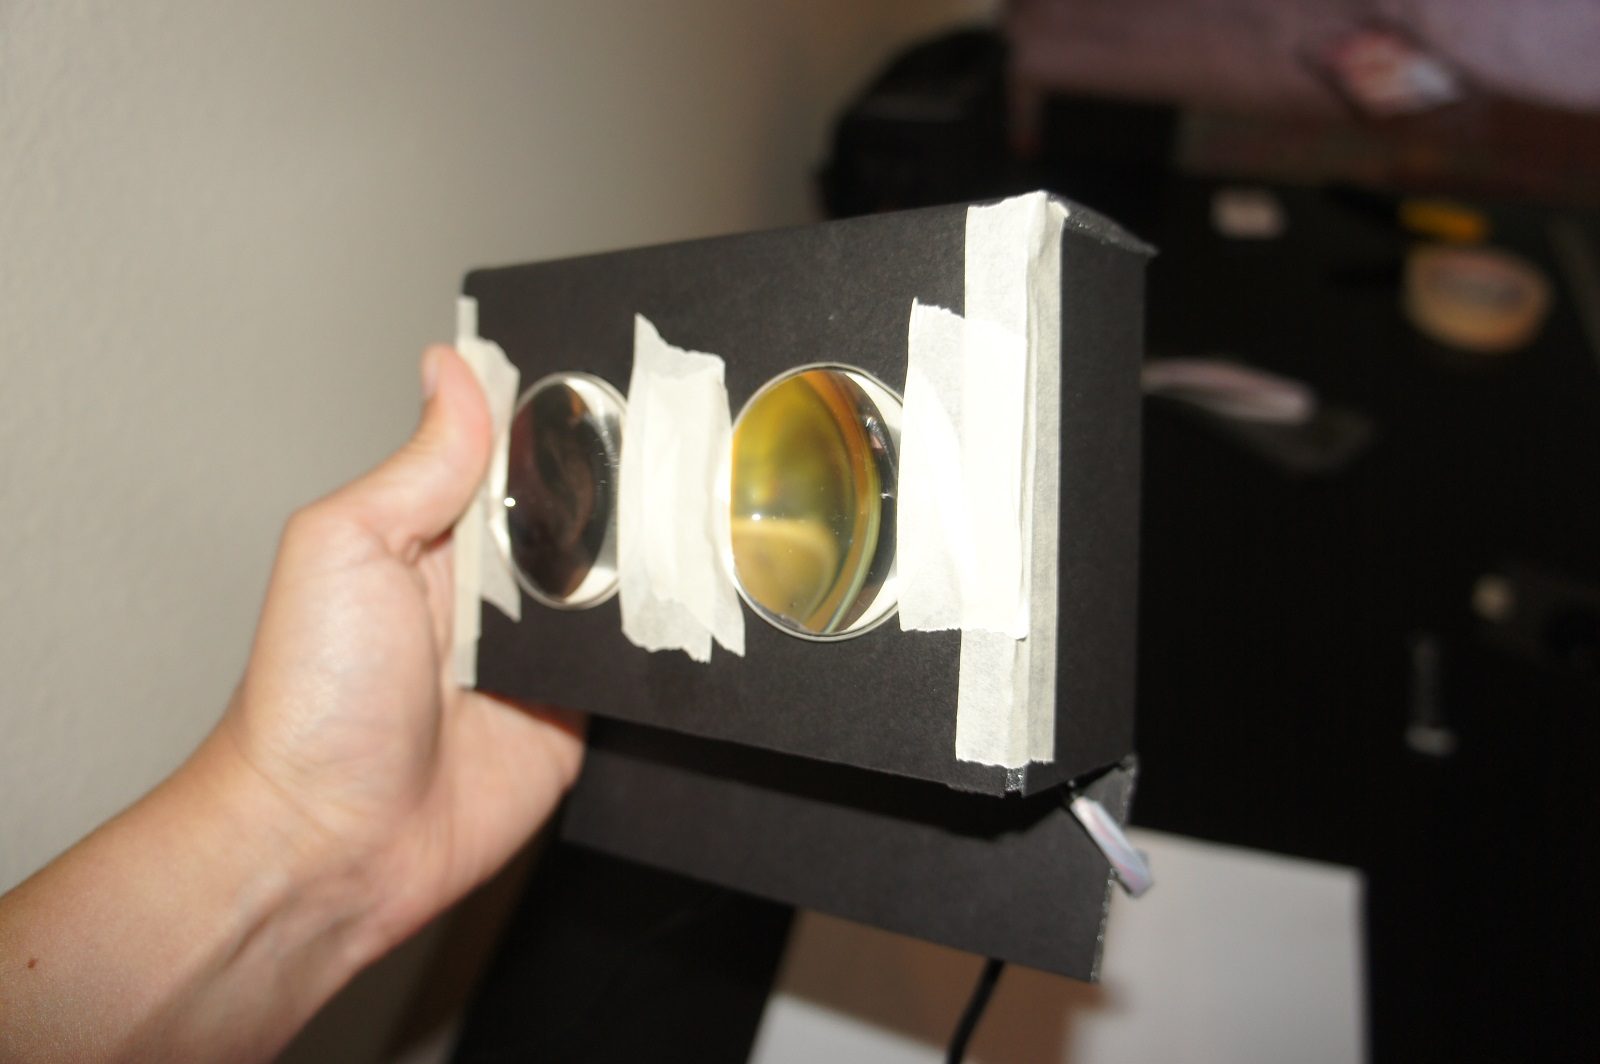
By looking at this picture, you will notice that the piece of tape I used on the left side of the left lens and on the right side of the right lens covers about 1cm of each lens. I recommend that you do the same and then cover those two pieces of tape with another layer of opaque black tape – by doing so you will be unable to see the edges of the LCD screen which will in turn make your HMD feel more immersive.