5. Mount the Screen
It is now time to add the electronics to the foam-core case and we will start by adding the screen.
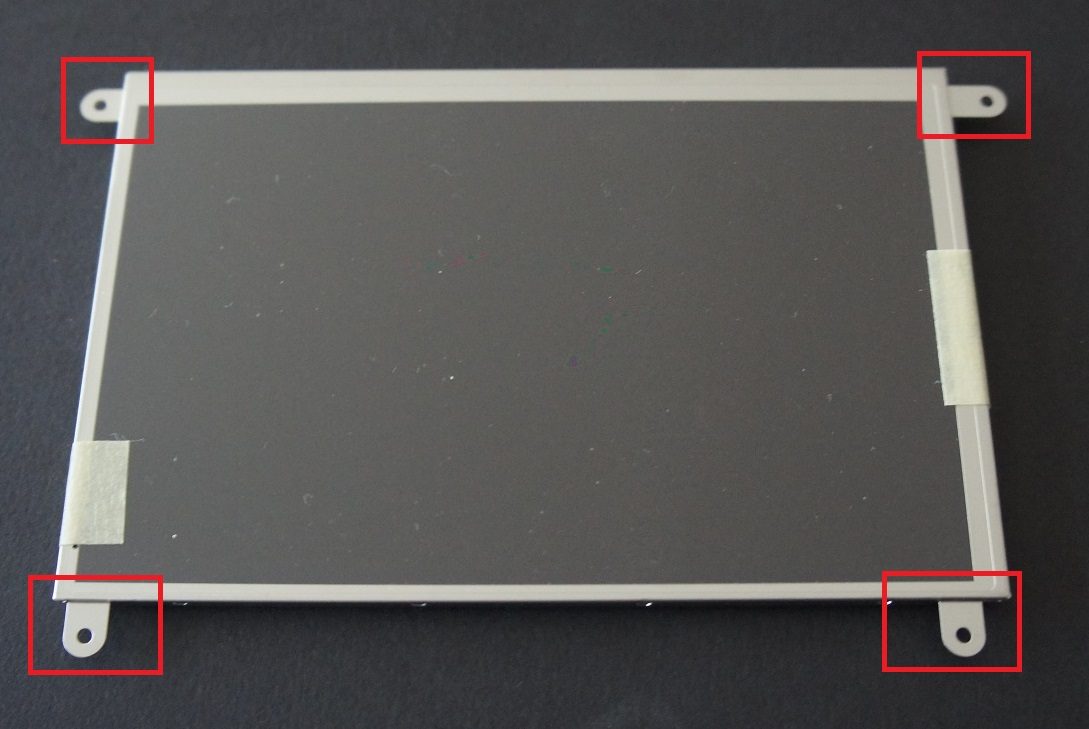
First, we must remove the factory screen protector and carefully bend these metal flaps around the screen upwards (towards the screen) about 70 degrees each:
Remember that the LCD screen is rather fragile, so it is best to carefully remove the metal frame from the screen (so very carefully) before trying to bend the flaps. Once you are done, lay the case cutout so the lenses are at the top and all v-cuts are facing up. The screen should be taped upwards (with the LVDS cable properly connected) to the third section of the case, counting from the top, which is the one with the lateral flaps.
Hint: tape a small piece of folded paper as thick as your LVDS cable to the opposite side where the LVDS connector is located on the back of the display to make sure the screen is properly leveled.
Apply the tape around the screen’s metal frame and be careful to not apply any tape directly to the screen. Now carefully turn the shell cutout so the screen is facing down and use a piece of non-conductive two-sided foam tape to secure the LCD controller board to the opposite side of the foam sheet where you taped the screen to.
Next it is time to fold your case along the v-cut fold lines, securing each flap in place with duct tape, except for the bottom one. Before we move on, you should also make a small cut to the bottom flap so the LVDS cable can pass through later when it is time to close the case.
Here is what the folded-up case should look like:
And from the back: