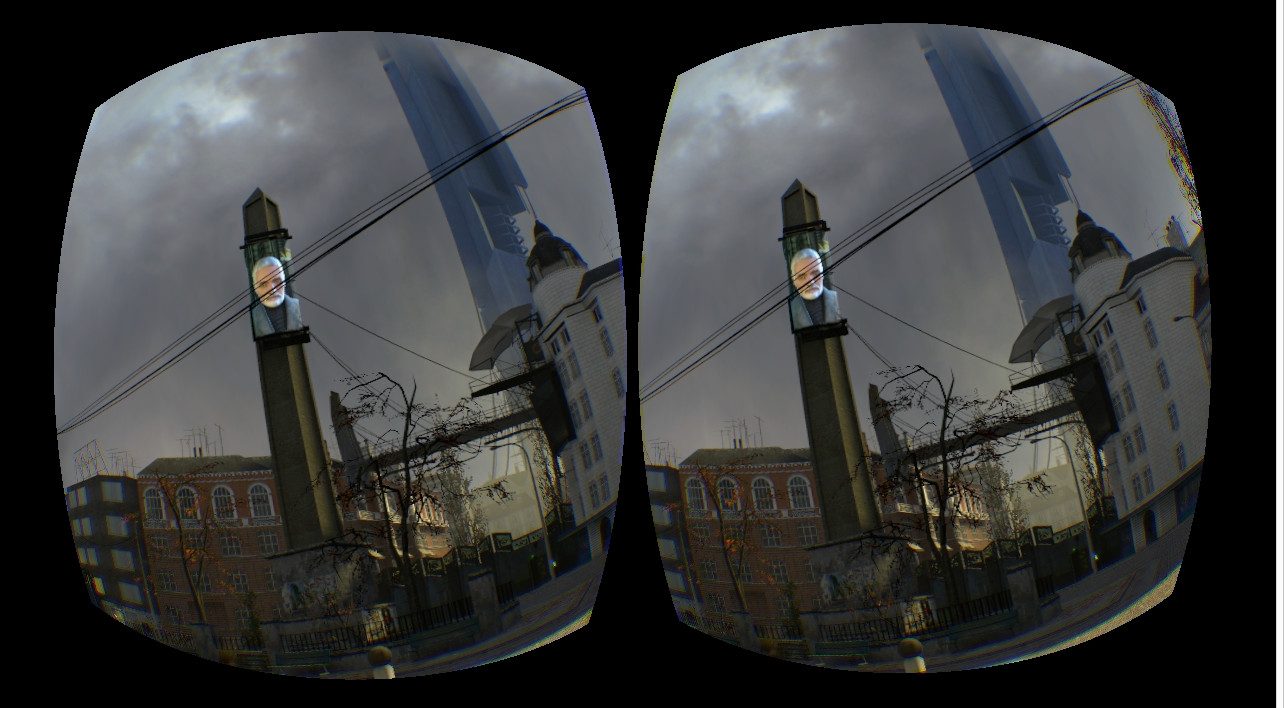
A couple of days ago, Oculus announced that Half-Life 2 now has official support for the Oculus Rift, albeit in an early beta form. Compared with unofficial mods and hacks, the experience (once working correctly) is incredibly compelling and impressive. However, getting the game working optimally is currently a minor challenge, for those of you unwilling to pour time into config tweaking we run through the basics.
Freeman gets Rifted
We posted earlier the basic steps supplied by Oculus on how to at least activate the experimental VR mode in Half-Life 2. For easy reference we’ve summarised these steps as part of the article.
Note: At present I have been unable to get Episode one of the story to work properly, Episode 2 and beyond seem to display as expected however.
This guide, like this experimental mode, is very much a work in progress. Please do let me know if there any errors or anything you think should be in the guide.
Activating VR Mode
HL2 with Rift support is supplied as part of the SteamPipe beta branch and as such you’ll have to ‘opt in’ to receive this new version. To do so:
1) Open Steam and ensure you’re not in ‘Offline mode’.
2) Go to your game library and right click the ‘Half-Life 2’ entry then select ‘Properties’
3) Click the ‘Betas’ tab and select ‘Beta – SteamPipe beta’ from the dropdown list.
4) Click the ‘General’ tab and then the ‘Set launch options’ button. Add ‘-vr’ (without single quotes) to the text box and click ‘OK’.
5) I now recommend closing Steam and reopening again to initiate any downloads and updates activating the beta has triggered.
6) Start ‘Half-Life 2’, you should now find it running in stereo 3d with the familiar pre-warping for each eye present.
*** If the game complains about a particular Direct X mode, add: Just add ‘-dxlevel 90’ to your launch options (without single quotes) ** Credit to vesper73 from /r/oculus for that.
Initial Run check and Enabling the Developer Console
1) Go to ‘Options’ from the main menu, select the ‘Keyboard’ then click the ‘Advanced’ button.
2) Make sure the ‘Enable Developer Console’ checkbox is ticked and click ‘OK’.
3) Exit from the game.
Calibrating Team Fortress 2 to generate the right Config
Note: Some of you may already have run through the TF2 calibration process, however some reports state that recent updates may have zeroed that calibration data so it’s worth running through this process once again.
1) Start TF2 from steam and if you haven’t already, enable the Developer Console using the same steps as for HL2 above
2) Press the tilde key (¬ on US / UK keyboards – top left key usually) to bring down the developer console.
3) Type: vr_calibration and hit enter
4) This will launch the TF2 IPD (Inter Pupillary Distance) calibration tool to gather the right eye distance for you.
5) Run through the steps as detailed onscreen (broadly speaking, run through moving green lines to the edge of your vision for each eyes with the cursor keys and clicking OK or hitting enter until all steps are complete). Once complete, hit ‘OK’.
6) Exit Team Fortress 2
Importing your new Config variabled into Half-Life 2
Note: If you’re running Windows 7 / 8 you may need to launch your text editor as Administrator in order to write changes to the config files. Right-click your text editor’s icon and select ‘Run as Administrator’
1) Open your text editor of choice (notepad is not recommended as it’ll not format the files correctly – wordpad should be fine as a minimum). Open your Team Fortress 2 config file from:
<path to steam>\steamapps\common\Team Fortress 2\tf\cfg\config.cfg
..so for reference, my full path was:
C:\Program Files (x86)\Steam\steamapps\common\Team Fortress 2\tf\cfg\config.cfg
..I suspect for most it’ll be the same.
2) Select and copy all variables beginning with ‘vr_’ – I ended up with the following variables to copy:
vr_moveaim_mode “3”
vr_moveaim_mode_zoom “3”
vr_moveaim_reticle_yaw_limit “10”
vr_moveaim_reticle_pitch_limit “30”
vr_moveaim_reticle_yaw_limit_zoom “0”
vr_moveaim_reticle_pitch_limit_zoom “-1”
vr_zoom_multiplier “2.0”
vr_separation_user_inches “2.5”
vr_separation_toein_pixels “2”
vr_hud_max_fov “60”
vr_hud_forward “500”
vr_hud_display_ratio “0.95”
vr_hud_axis_lock_to_world “0”
vr_neckmodel_up “6.5”
vr_neckmodel_forwards “4”
vr_ipdtest_left_t “260”
vr_ipdtest_left_b “530”
vr_ipdtest_left_i “550”
vr_ipdtest_left_o “200”
vr_ipdtest_right_t “260”
vr_ipdtest_right_b “530”
vr_ipdtest_right_i “550”
vr_ipdtest_right_o “200”
oculus_lens_type “A”
..note the last line with specifies which Oculus Lense type you use in your dev kit. You’ll need to alter this letter to correspond to whichever you use (A, B or C).
3) Now that those variables are copied to your clipboard, open your Half-Life 2 config file. Again, for me that was:
C:\Program Files (x86)\Steam\steamapps\common\Half-Life 2\hl2\cfg
..but may differ for you.
4) Find the corresponding variables listed above in this config file and delete. Then simply paste the variables on your clipboard to the bottom of the config file. Save. ** Note: You may want to backup this file before editing just in case
5) Launch Half-Life 2 through Steam as normal and enjoy your newly calibrated VR experience. :)
Additional notes
– One variable of note: vr_separation_toein_pixels “2” ..is worth playing with. Value is 0-2 and can decrease eye-strain at lower settings by sacrificing stereo separation.
– “I had a really weird warping issue from FOV not being set up correctly – in the game options I turned down the FOV to 75 and it all looked much better.” from JKCH on /r/oculus
Thanks to peeps from the /r/oculus in particular EntroperZero for his sterling work.